Kitchen flooring in Pierce County costs between $3 and $25 per square foot installed, depending on the material you choose. For a typical 150-square-foot Puyallup kitchen, that puts your total between $450 and $3,750 before you factor in demo, subfloor prep, and transitions. I’ve installed every option on this list in homes across the area, and I’ll walk you through what each one actually costs, how it holds up, and which materials make the most sense for Pacific Northwest kitchens.
I’m Brad Zemke, owner of Pacific Remodeling here in Puyallup. Third-generation carpenter, 20+ years in the trades, running this business in Pierce County since 2018.
Kitchen Flooring Options and Costs at a Glance
Before I break down each material, this table gives you the full picture. Every number reflects what I quote and install right here in Pierce County. Not national averages pulled from some database.
| Flooring Type | Installed Cost/sq ft | 150 sq ft Kitchen | Lifespan | Water Resistance | Best For |
|---|---|---|---|---|---|
| Sheet vinyl | $3 - $7 | $450 - $1,050 | 10-15 years | Excellent | Budget refresh, rentals |
| Luxury vinyl plank (LVP) | $6 - $13 | $900 - $1,950 | 15-25 years | Excellent (waterproof) | Most kitchens, best value |
| Laminate | $5 - $10 | $750 - $1,500 | 10-20 years | Poor | Living rooms only, NOT kitchens |
| Ceramic tile | $7 - $15 | $1,050 - $2,250 | 25-50 years | Excellent | Budget tile option |
| Porcelain tile | $9 - $22 | $1,350 - $3,300 | 50+ years | Excellent | Long-term investment |
| Engineered hardwood | $8 - $18 | $1,200 - $2,700 | 20-30 years | Moderate | Wood look with PNW humidity tolerance |
| Cork (WPC core) | $9 - $13 | $1,350 - $1,950 | 15-20 years | Good | Craftsman and mid-century homes |
| Natural stone | $15 - $35 | $2,250 - $5,250 | 50+ years | Good | High-end custom kitchens |
Those numbers include material and labor but not demo, subfloor work, or transitions. I’ll cover those hidden costs later because they catch homeowners off guard on almost every job I do.
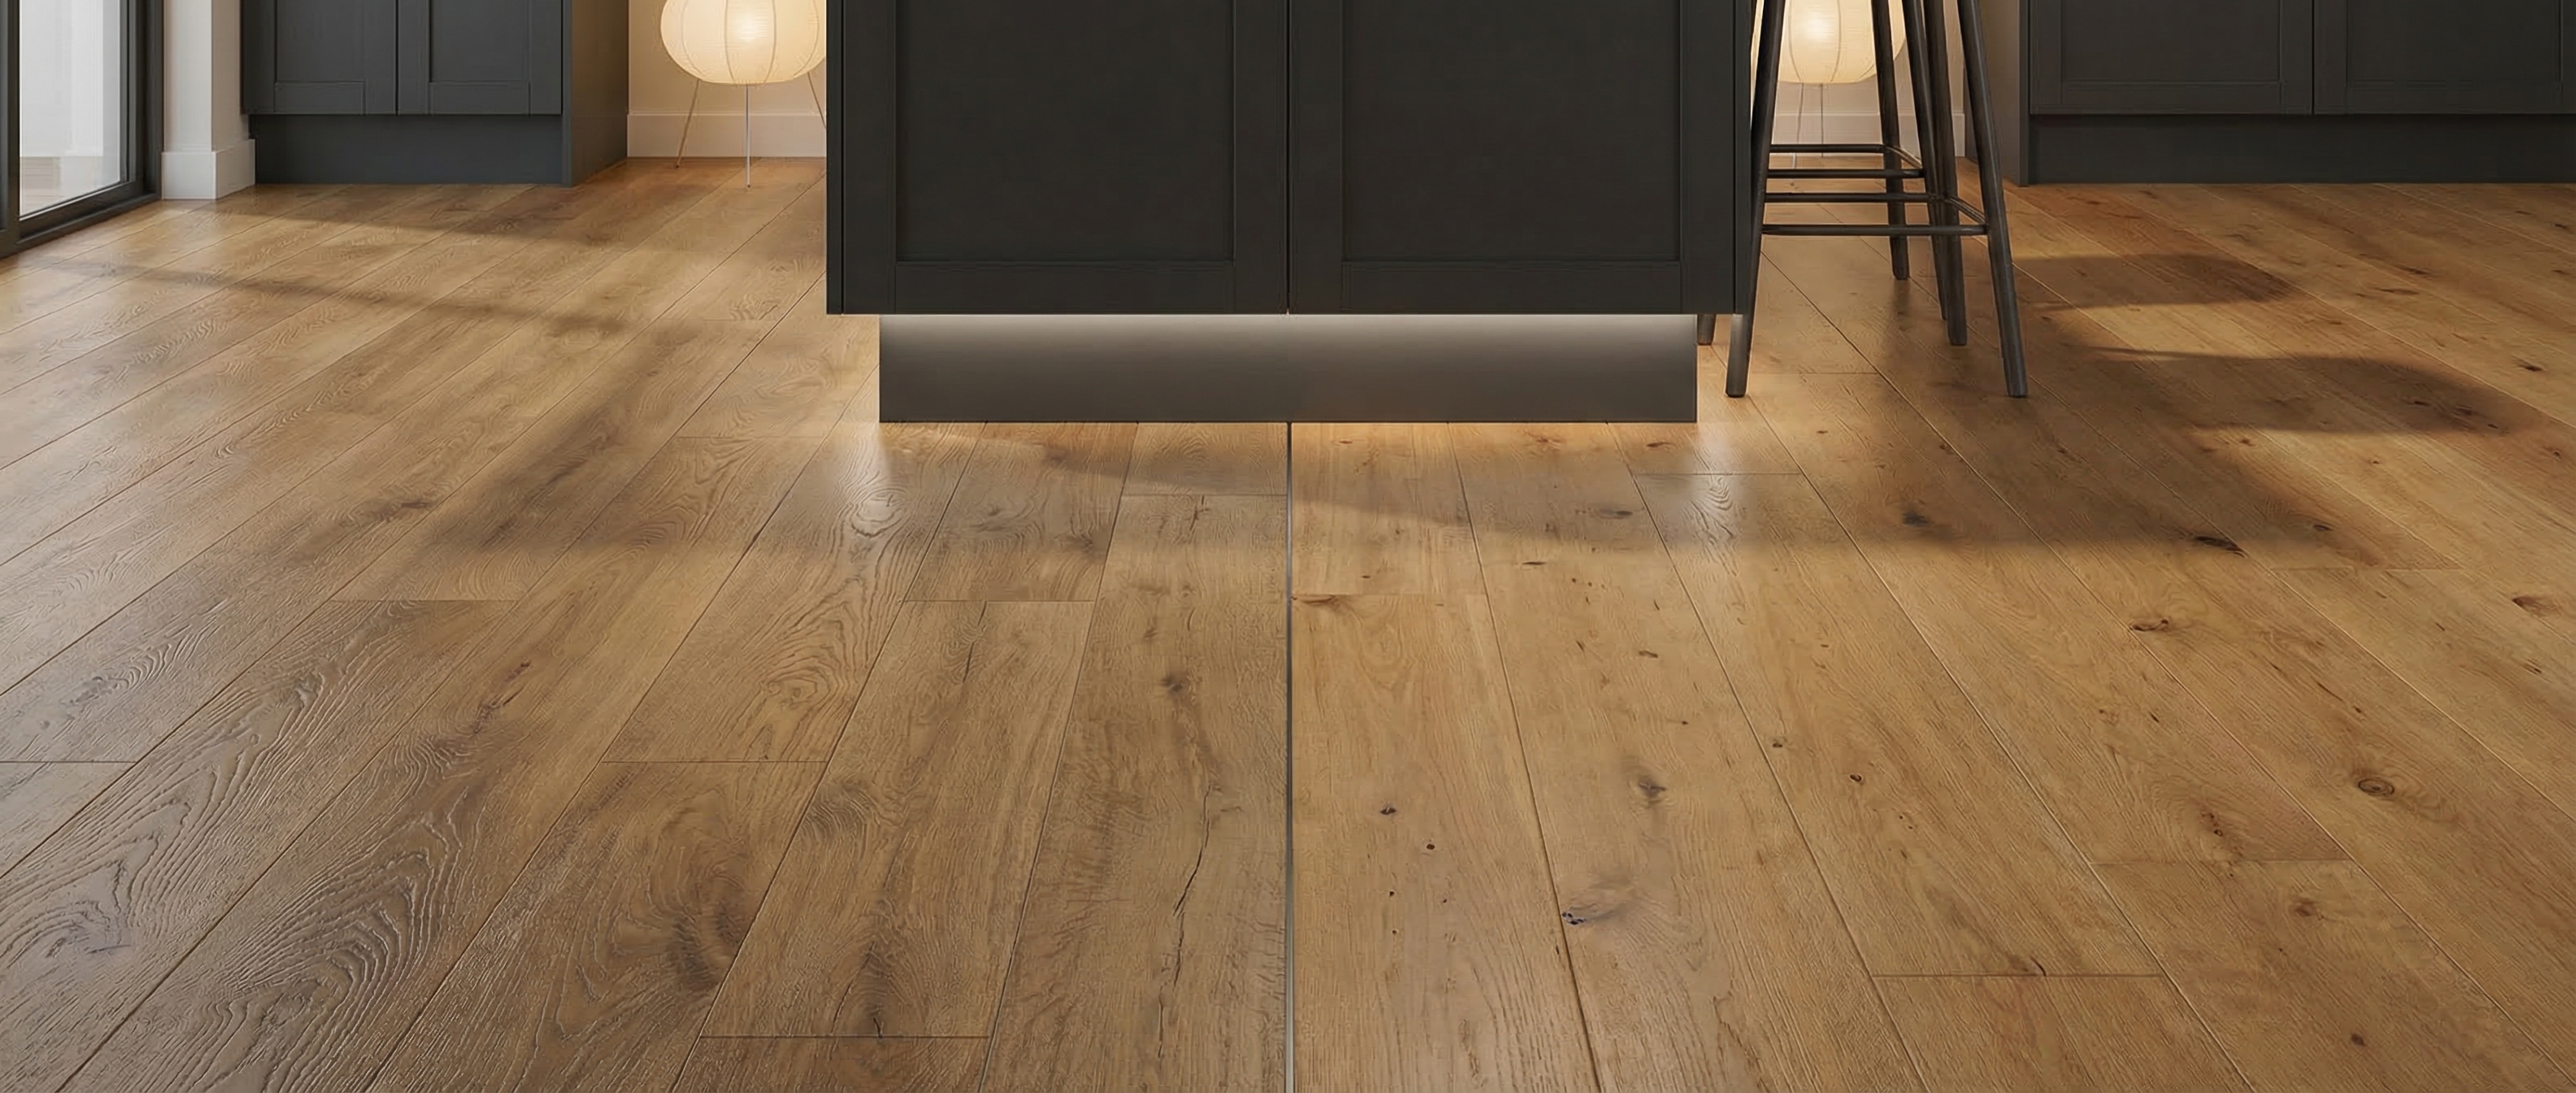
Luxury Vinyl Plank: The Floor I Install Most in Pierce County Kitchens
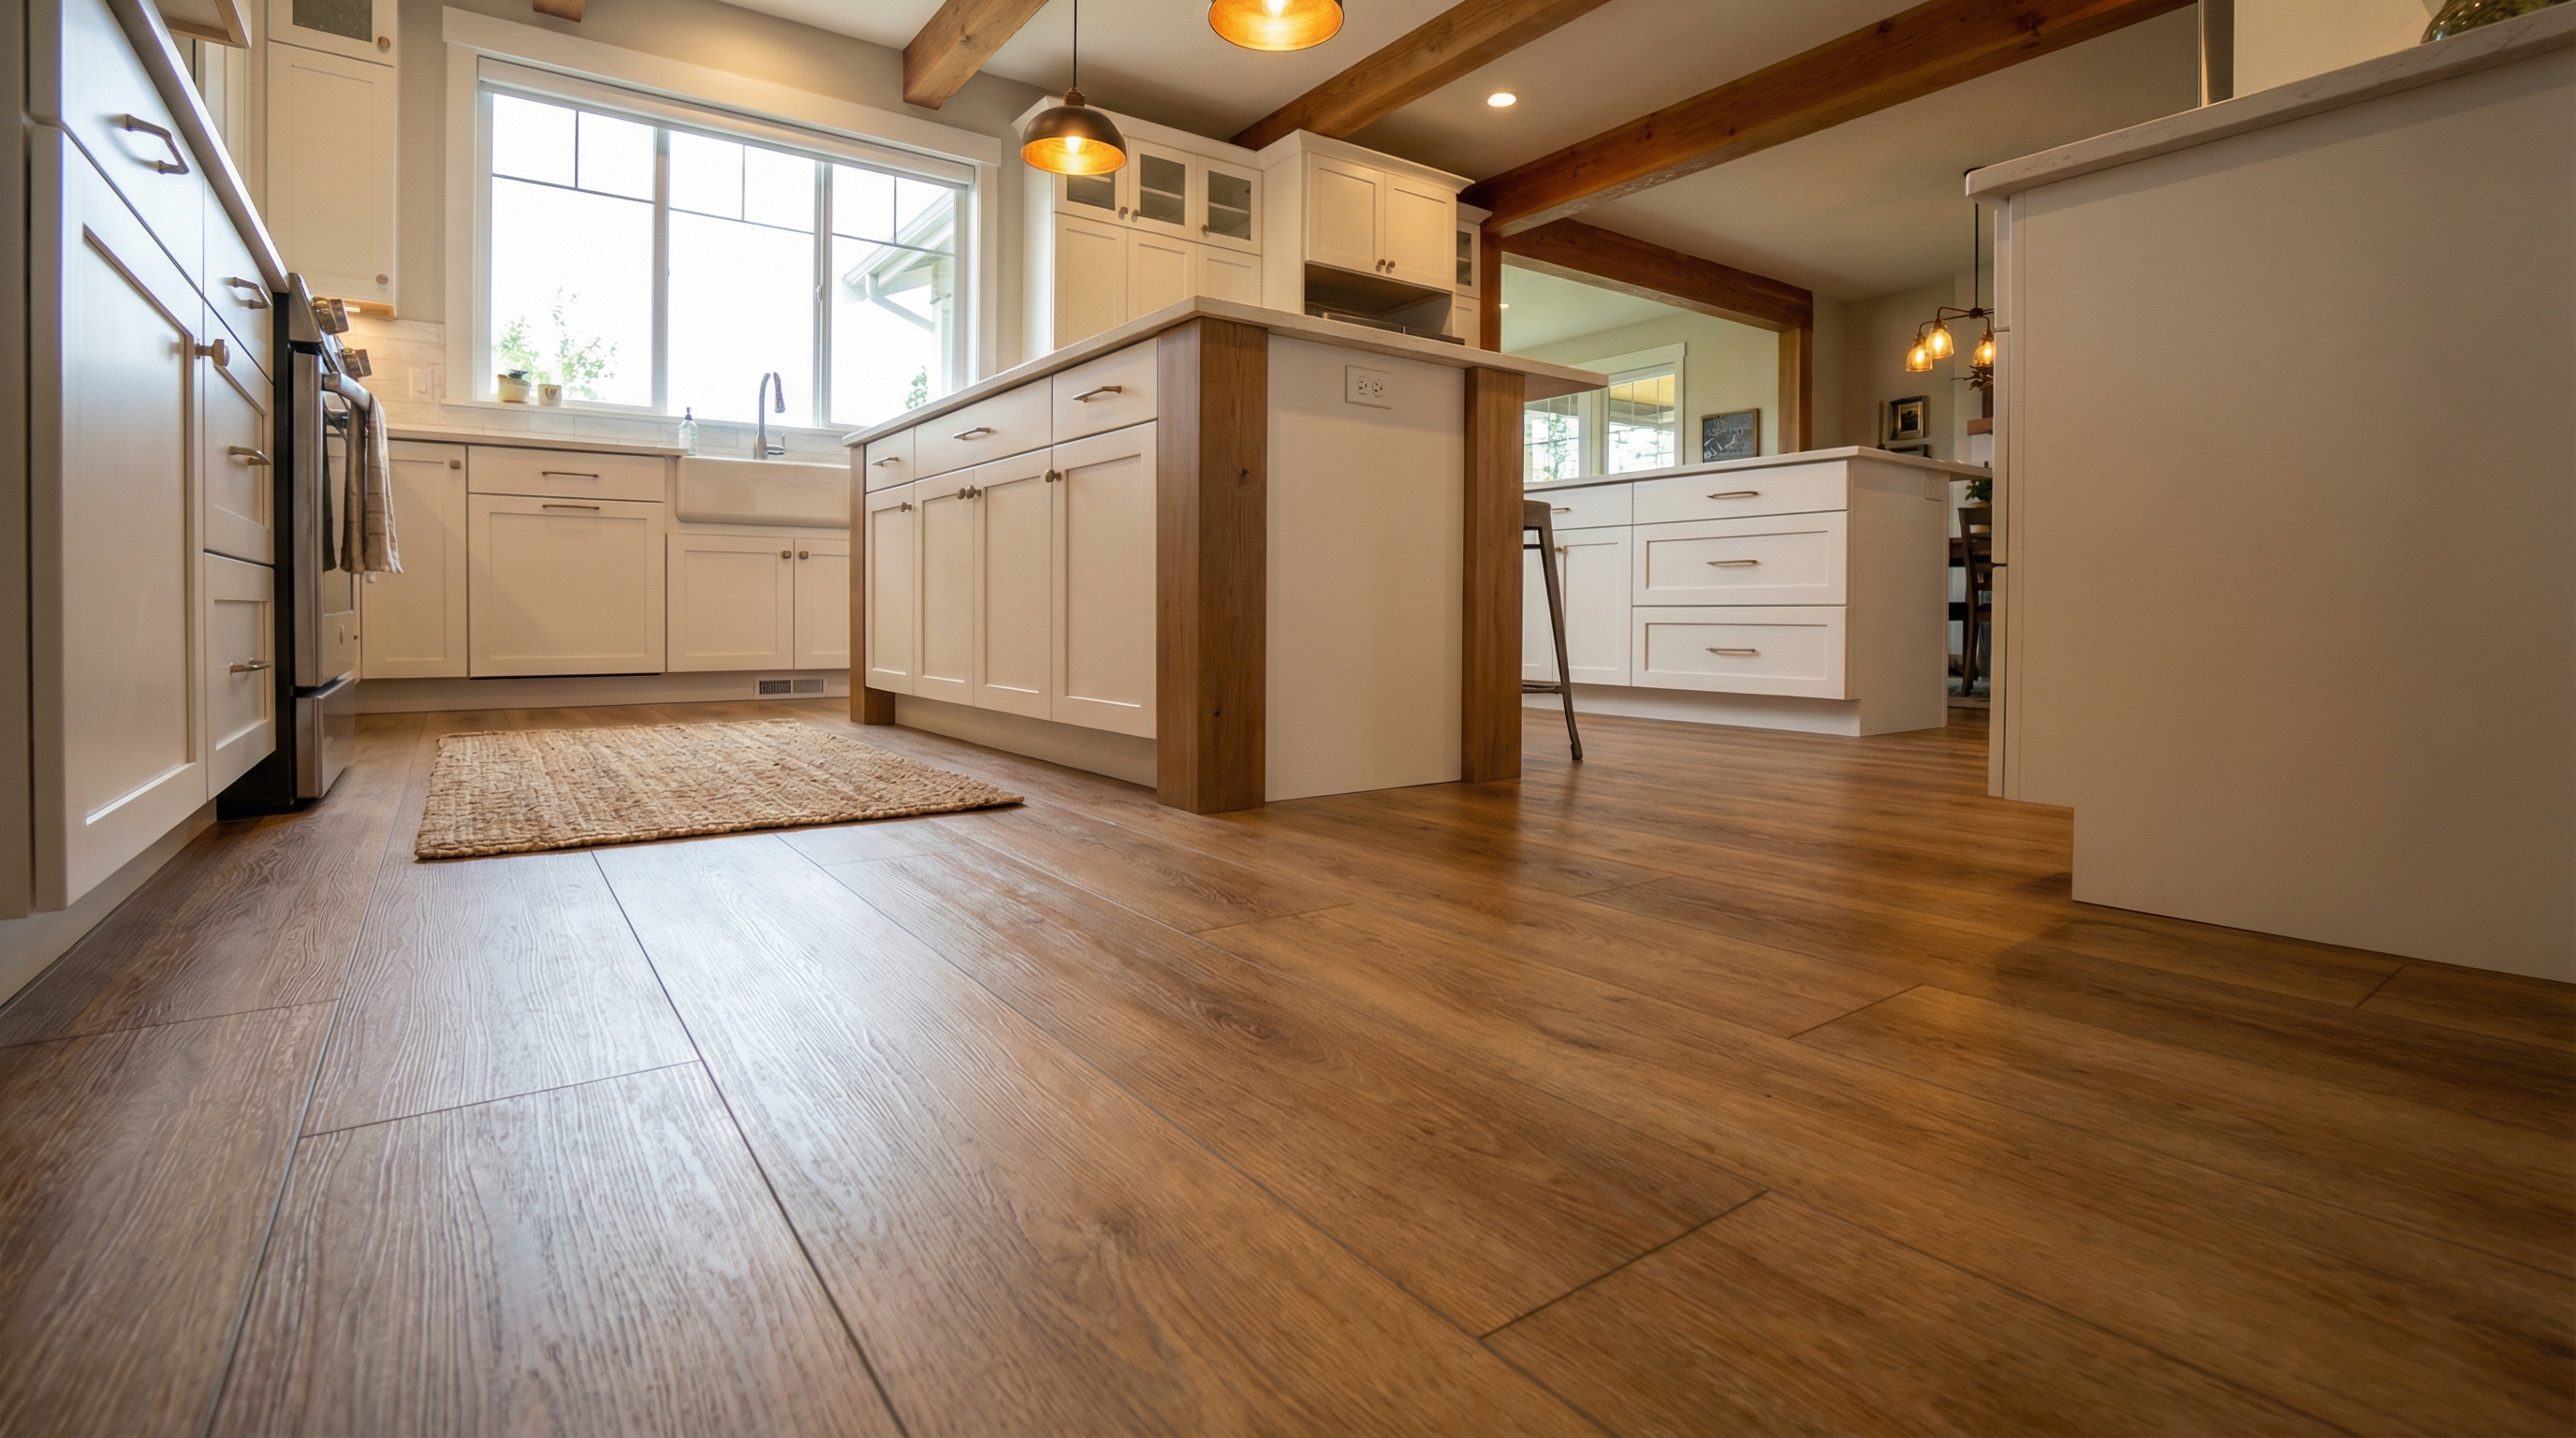
LVP dominates kitchen remodels in this market. I install it more than every other flooring material combined, and that’s not because it’s the cheapest option. It handles everything a PNW kitchen throws at it.
100% waterproof core. Warm underfoot. Installs in a day or two for most kitchens. Looks like real wood from three feet away. And it costs a fraction of what hardwood or tile runs.
Here’s what you’ll spend on LVP in a Pierce County kitchen:
-
Entry-level (12-mil wear layer): $6 - $8 per square foot installed. Products like LifeProof Sterling Oak or Pergo Outlast+. Fine for rentals or a quick update. I don’t put anything under 12 mil in a kitchen because thinner wear layers scratch too easily around the sink and stove.
-
Mid-range (20-mil wear layer): $9 - $13 per square foot installed. This is the sweet spot. Shaw Floorte Alto, COREtec Plus Enhanced, and Armstrong Vivero Best all land here. A 20-mil wear layer handles dropped pots, dog nails, and chair legs without showing damage for 15 to 20 years.
-
Premium (22+ mil wear layer): $12 - $16 per square foot installed. Karndean Korlok and Tarkett iD Inspiration 55 lead this tier. Quieter underfoot, wider planks up to 9.8 inches, and textures that look almost identical to real wood.
For a side-by-side comparison between LVP and real wood, I wrote a full breakdown in my LVP vs. hardwood flooring guide.
Buy SPC core, not WPC, for a kitchen floor. SPC (stone polymer composite) is denser, more rigid, and handles temperature swings better than WPC. In a kitchen where spills and temperature changes happen daily, SPC is the right call. WPC feels softer underfoot but it’s thicker, which creates more work at door transitions.
Why LVP Wins in the Pacific Northwest
I’ve lived and worked from Hawaii to Alaska to right here in Puyallup, and the PNW creates a specific set of challenges for flooring. Our homes sit on crawlspaces over clay-heavy soil. Moisture migrates up through subfloors year-round, especially in older homes across Spanaway, Graham, and Parkland. LVP with an SPC core doesn’t care. It won’t swell, buckle, or grow mold the way hardwood or laminate does when crawlspace humidity creeps above 60%.
That single fact matters more than most homeowners realize. I’ve pulled up hardwood floors in Pierce County homes that cupped and gapped within two years because the crawlspace vapor barrier had degraded. The homeowner spent $3,000 on beautiful oak, then spent another $3,000 ripping it out and replacing it with LVP. That’s $6,000 on flooring in 24 months. It didn’t need to happen.
Porcelain and Ceramic Tile: The Longest-Lasting Kitchen Floor

Tile has been the gold standard for kitchen floors for decades, and for good reason. Install porcelain tile properly and it will outlast the house.
The cost difference between ceramic and porcelain matters, and a lot of homeowners mix up the two at the store.
Ceramic tile is softer, easier to cut, and cheaper. It works fine for walls and low-traffic floors. For a kitchen that sees heavy daily use, I steer people toward porcelain.
Porcelain tile is denser, harder, and significantly more durable. It costs more to buy and more to install because the cuts require better tools and the material is heavier. But it handles everything a kitchen throws at it for 50+ years.
| Tile Type | Material Cost | Install Labor | Total Installed | Popular Products |
|---|---|---|---|---|
| Ceramic (12”x24”) | $1.50 - $3/sq ft | $6 - $10/sq ft | $7 - $15/sq ft | MSI Montagna, Florida Tile |
| Porcelain (12”x24”) | $2 - $5/sq ft | $7 - $12/sq ft | $9 - $18/sq ft | Dal-Tile Restore, Emser Craft |
| Large-format porcelain (24”x24”+) | $3 - $8/sq ft | $10 - $16/sq ft | $13 - $25/sq ft | Marazzi Glazed, Crossville |
| Wood-look porcelain (6”x24”) | $2 - $4/sq ft | $8 - $14/sq ft | $10 - $18/sq ft | MSI Montagna Rustic Bay |
Tile labor runs higher than any other kitchen flooring because the installation demands more steps. Your installer needs cement board (HardieBacker or Schluter DITRA) over the subfloor, thinset mortar, precise cuts, and grout. That’s 2 to 4 days of skilled work for a 150-square-foot kitchen, compared to 1 day for LVP.
Grout Selection Matters More Than You Think
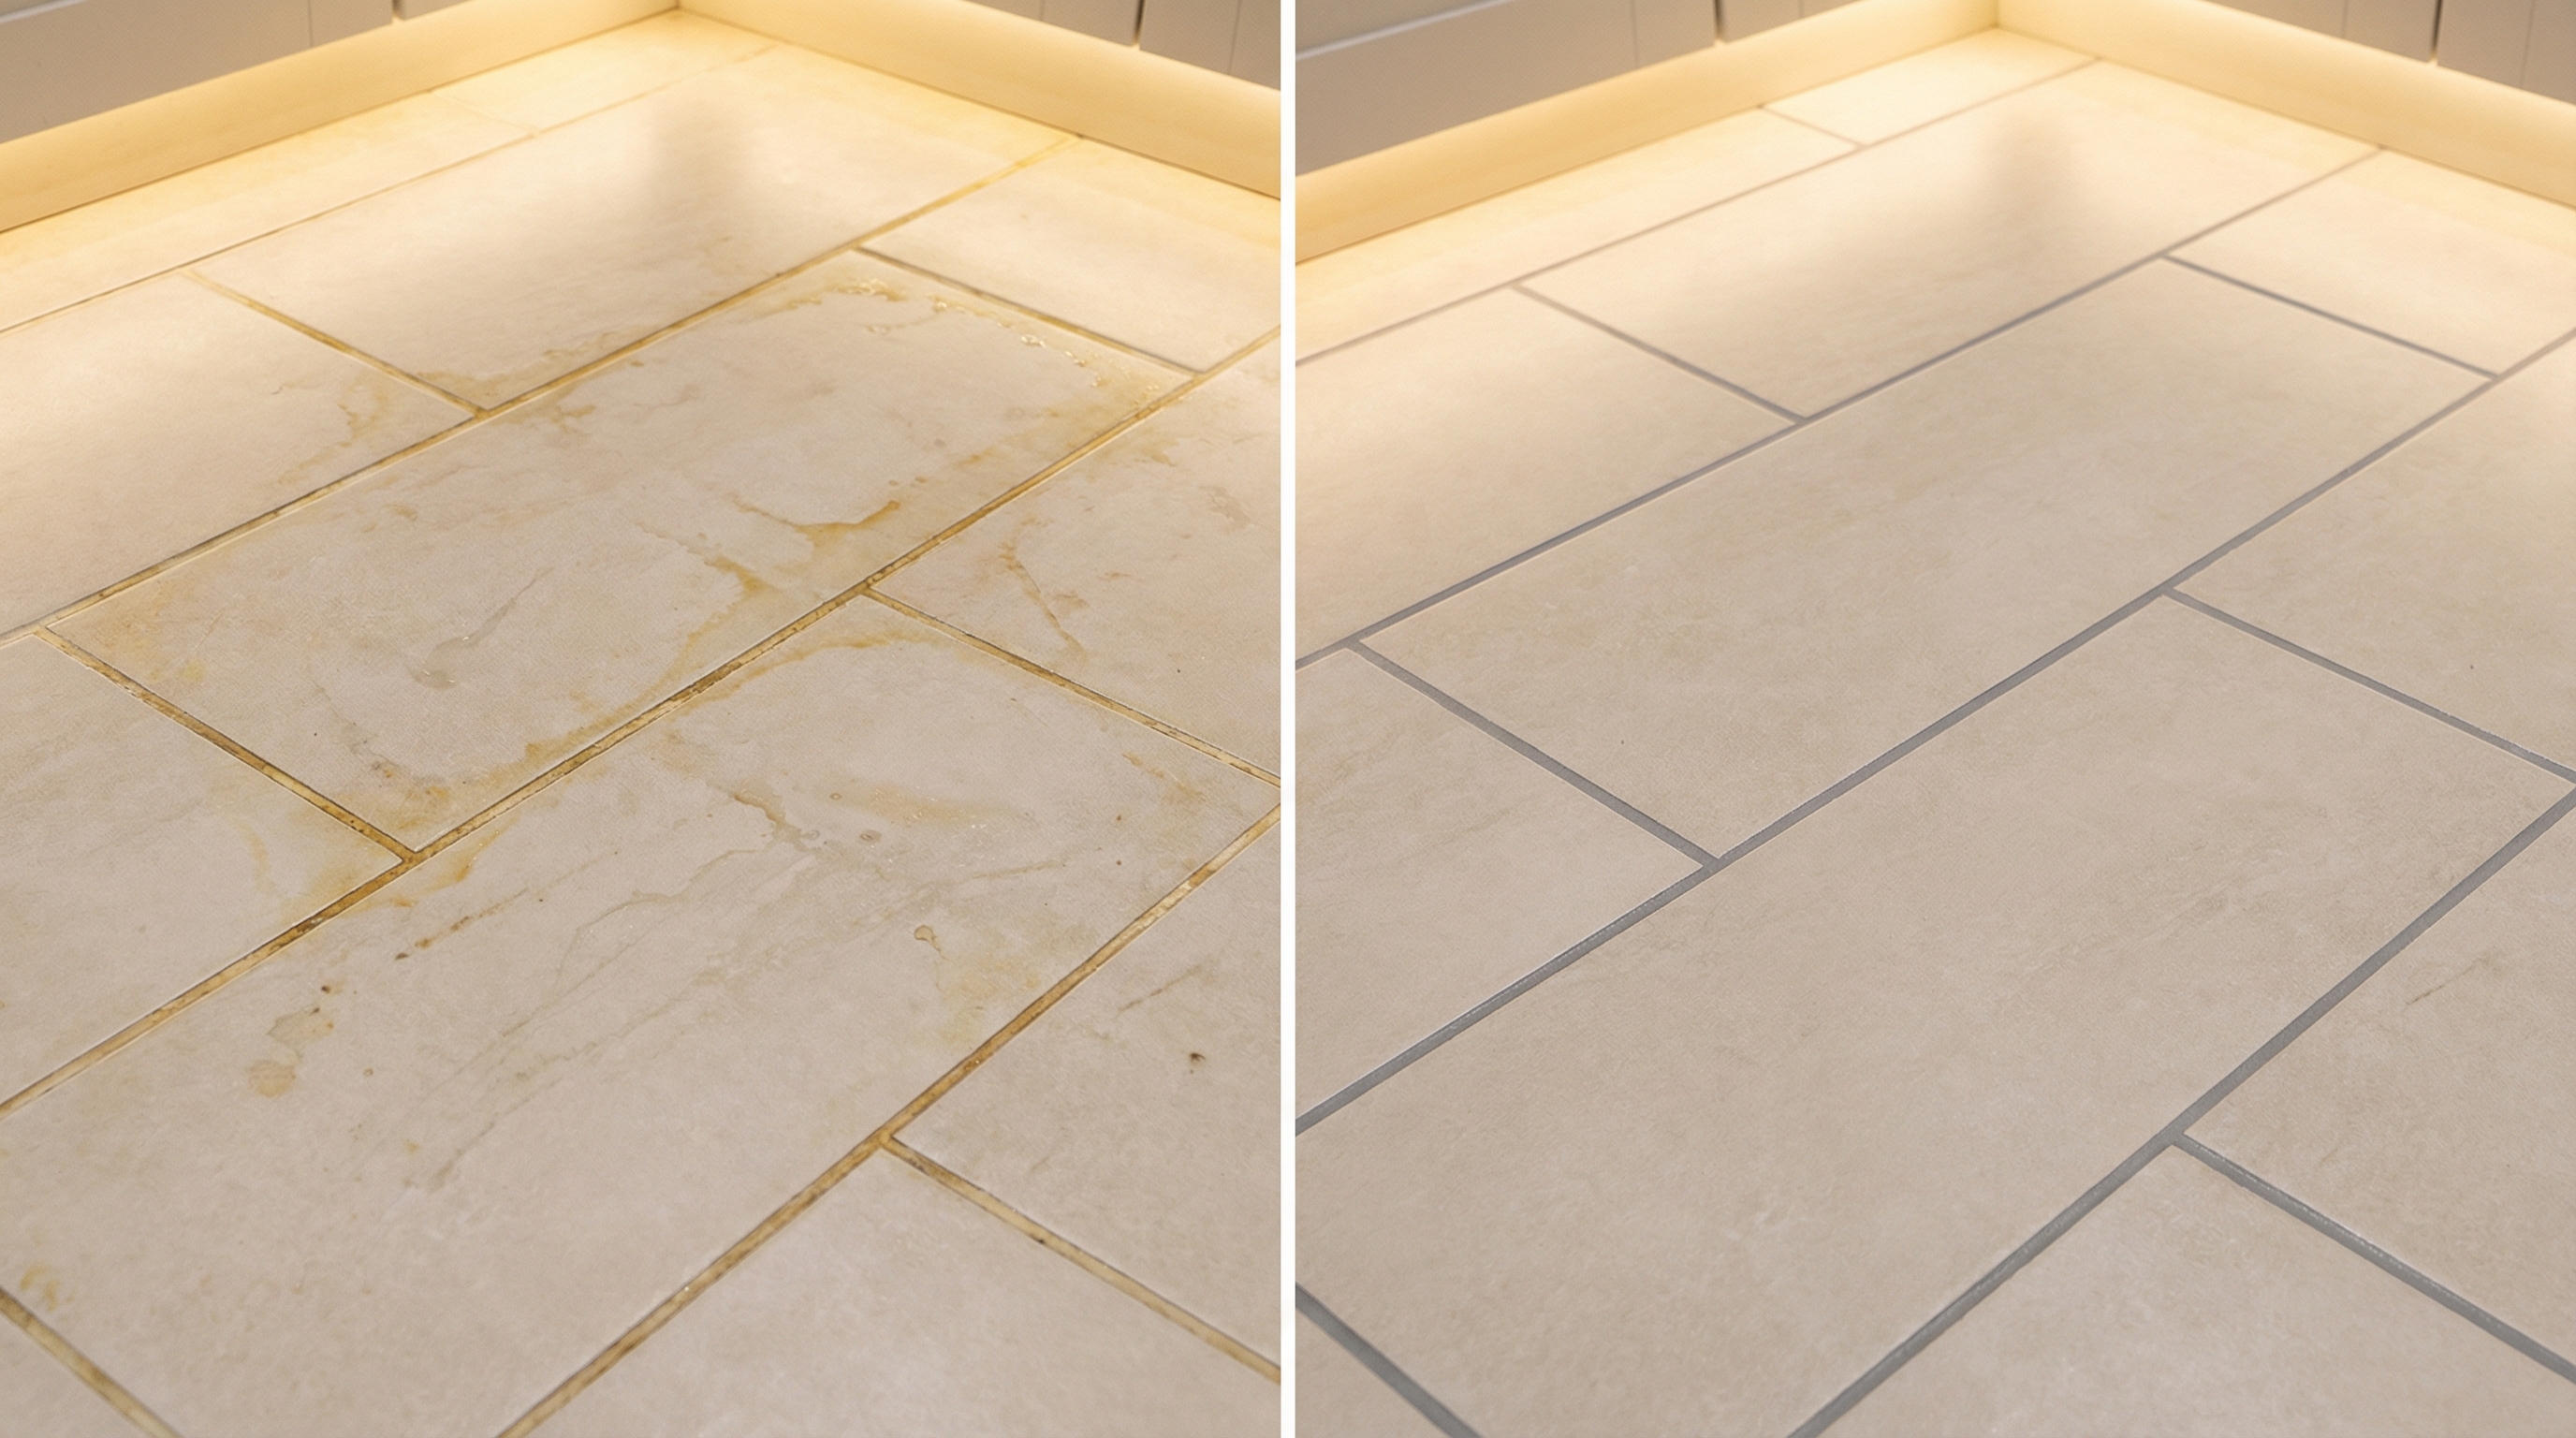
I install a lot of tile in PNW kitchens, and grout is where homeowners make costly mistakes. Standard sanded grout stains from cooking splatter and humidity within a year unless you reseal it regularly.
My recommendation for every kitchen tile floor: epoxy grout. Laticrete SpectraLOCK or Mapei Kerapoxy. It adds $1.50 to $2.50 per square foot in labor, but it never needs sealing, never stains, and never absorbs moisture. Over the life of the floor, epoxy grout saves you money because you skip the annual resealing that standard grout requires.
Color matters too. Pick medium gray. White grout in a kitchen browns within months, especially in our PNW humidity. Charcoal shows every crumb. Medium gray hides the everyday mess and reads neutral at resale.
Radiant Heat Under Tile
Porcelain tile is the best conductor for electric radiant floor heating. If you’ve ever stepped onto a cold tile floor at 6 a.m. on a January morning in Puyallup, you know why this conversation matters.
Schluter DITRA-HEAT mats installed under porcelain tile run $8 to $15 per square foot on top of the tile installation cost. For a 150-square-foot kitchen, that adds $1,200 to $2,250. My clients who add radiant heat say it changes how they feel about their kitchen during the wet months.
Here’s the catch with radiant heat: decide on it BEFORE you pick your flooring material. Tile and porcelain conduct heat well. Engineered hardwood barely tolerates it (max 80 degrees surface temp). LVP limits to 85 degrees surface temp and you need to verify with the manufacturer first. Cork insulates instead of conducting, so it defeats the purpose entirely.
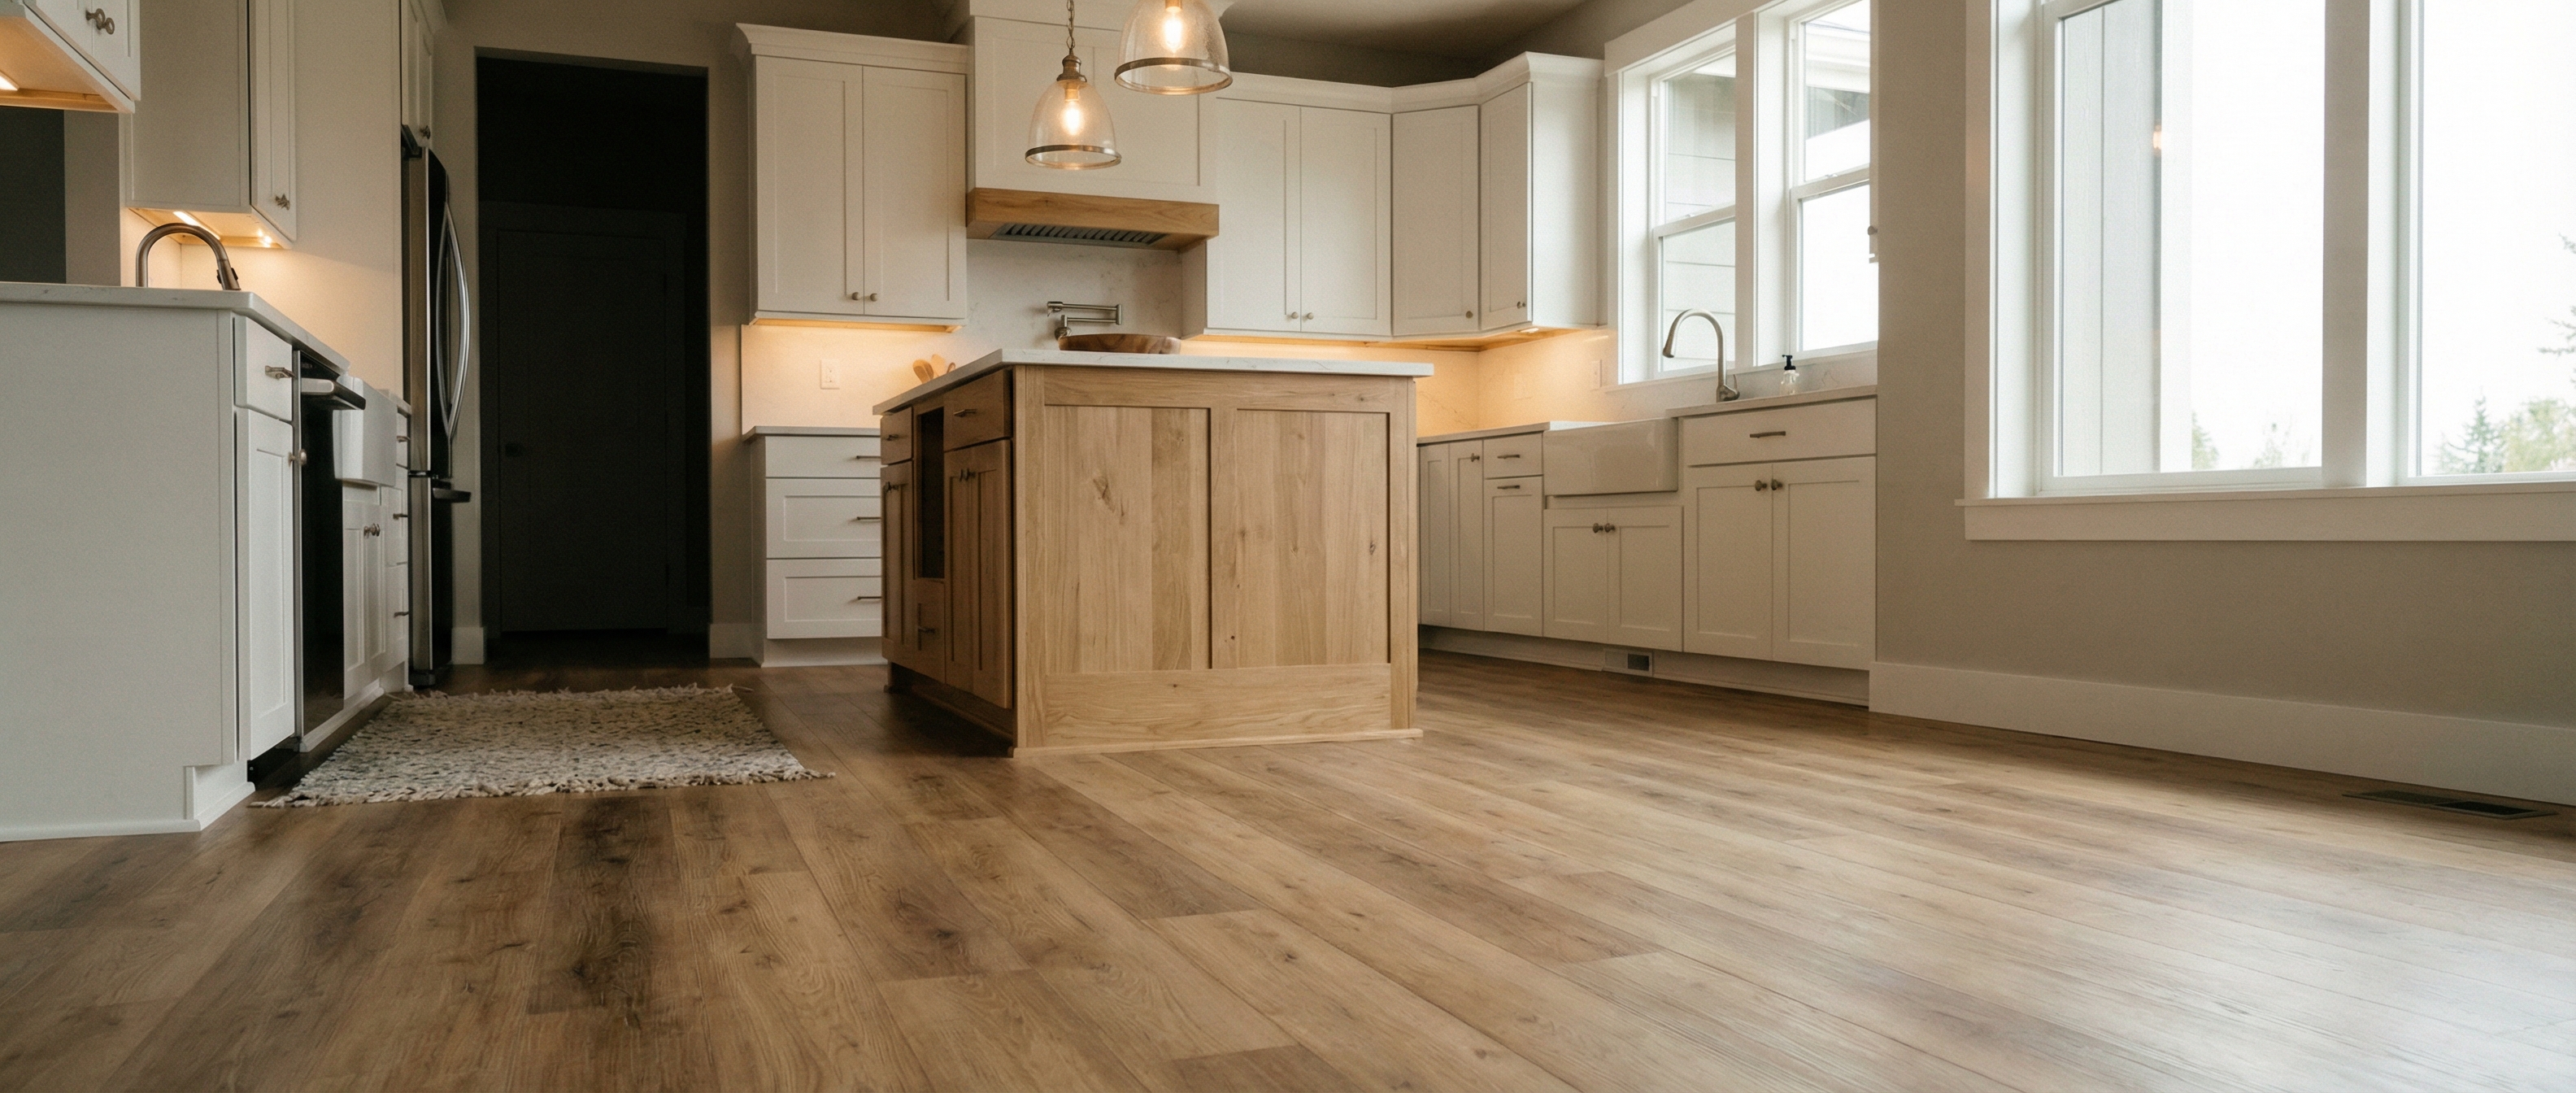
Engineered Hardwood: The Wood Floor That Actually Works in a Kitchen
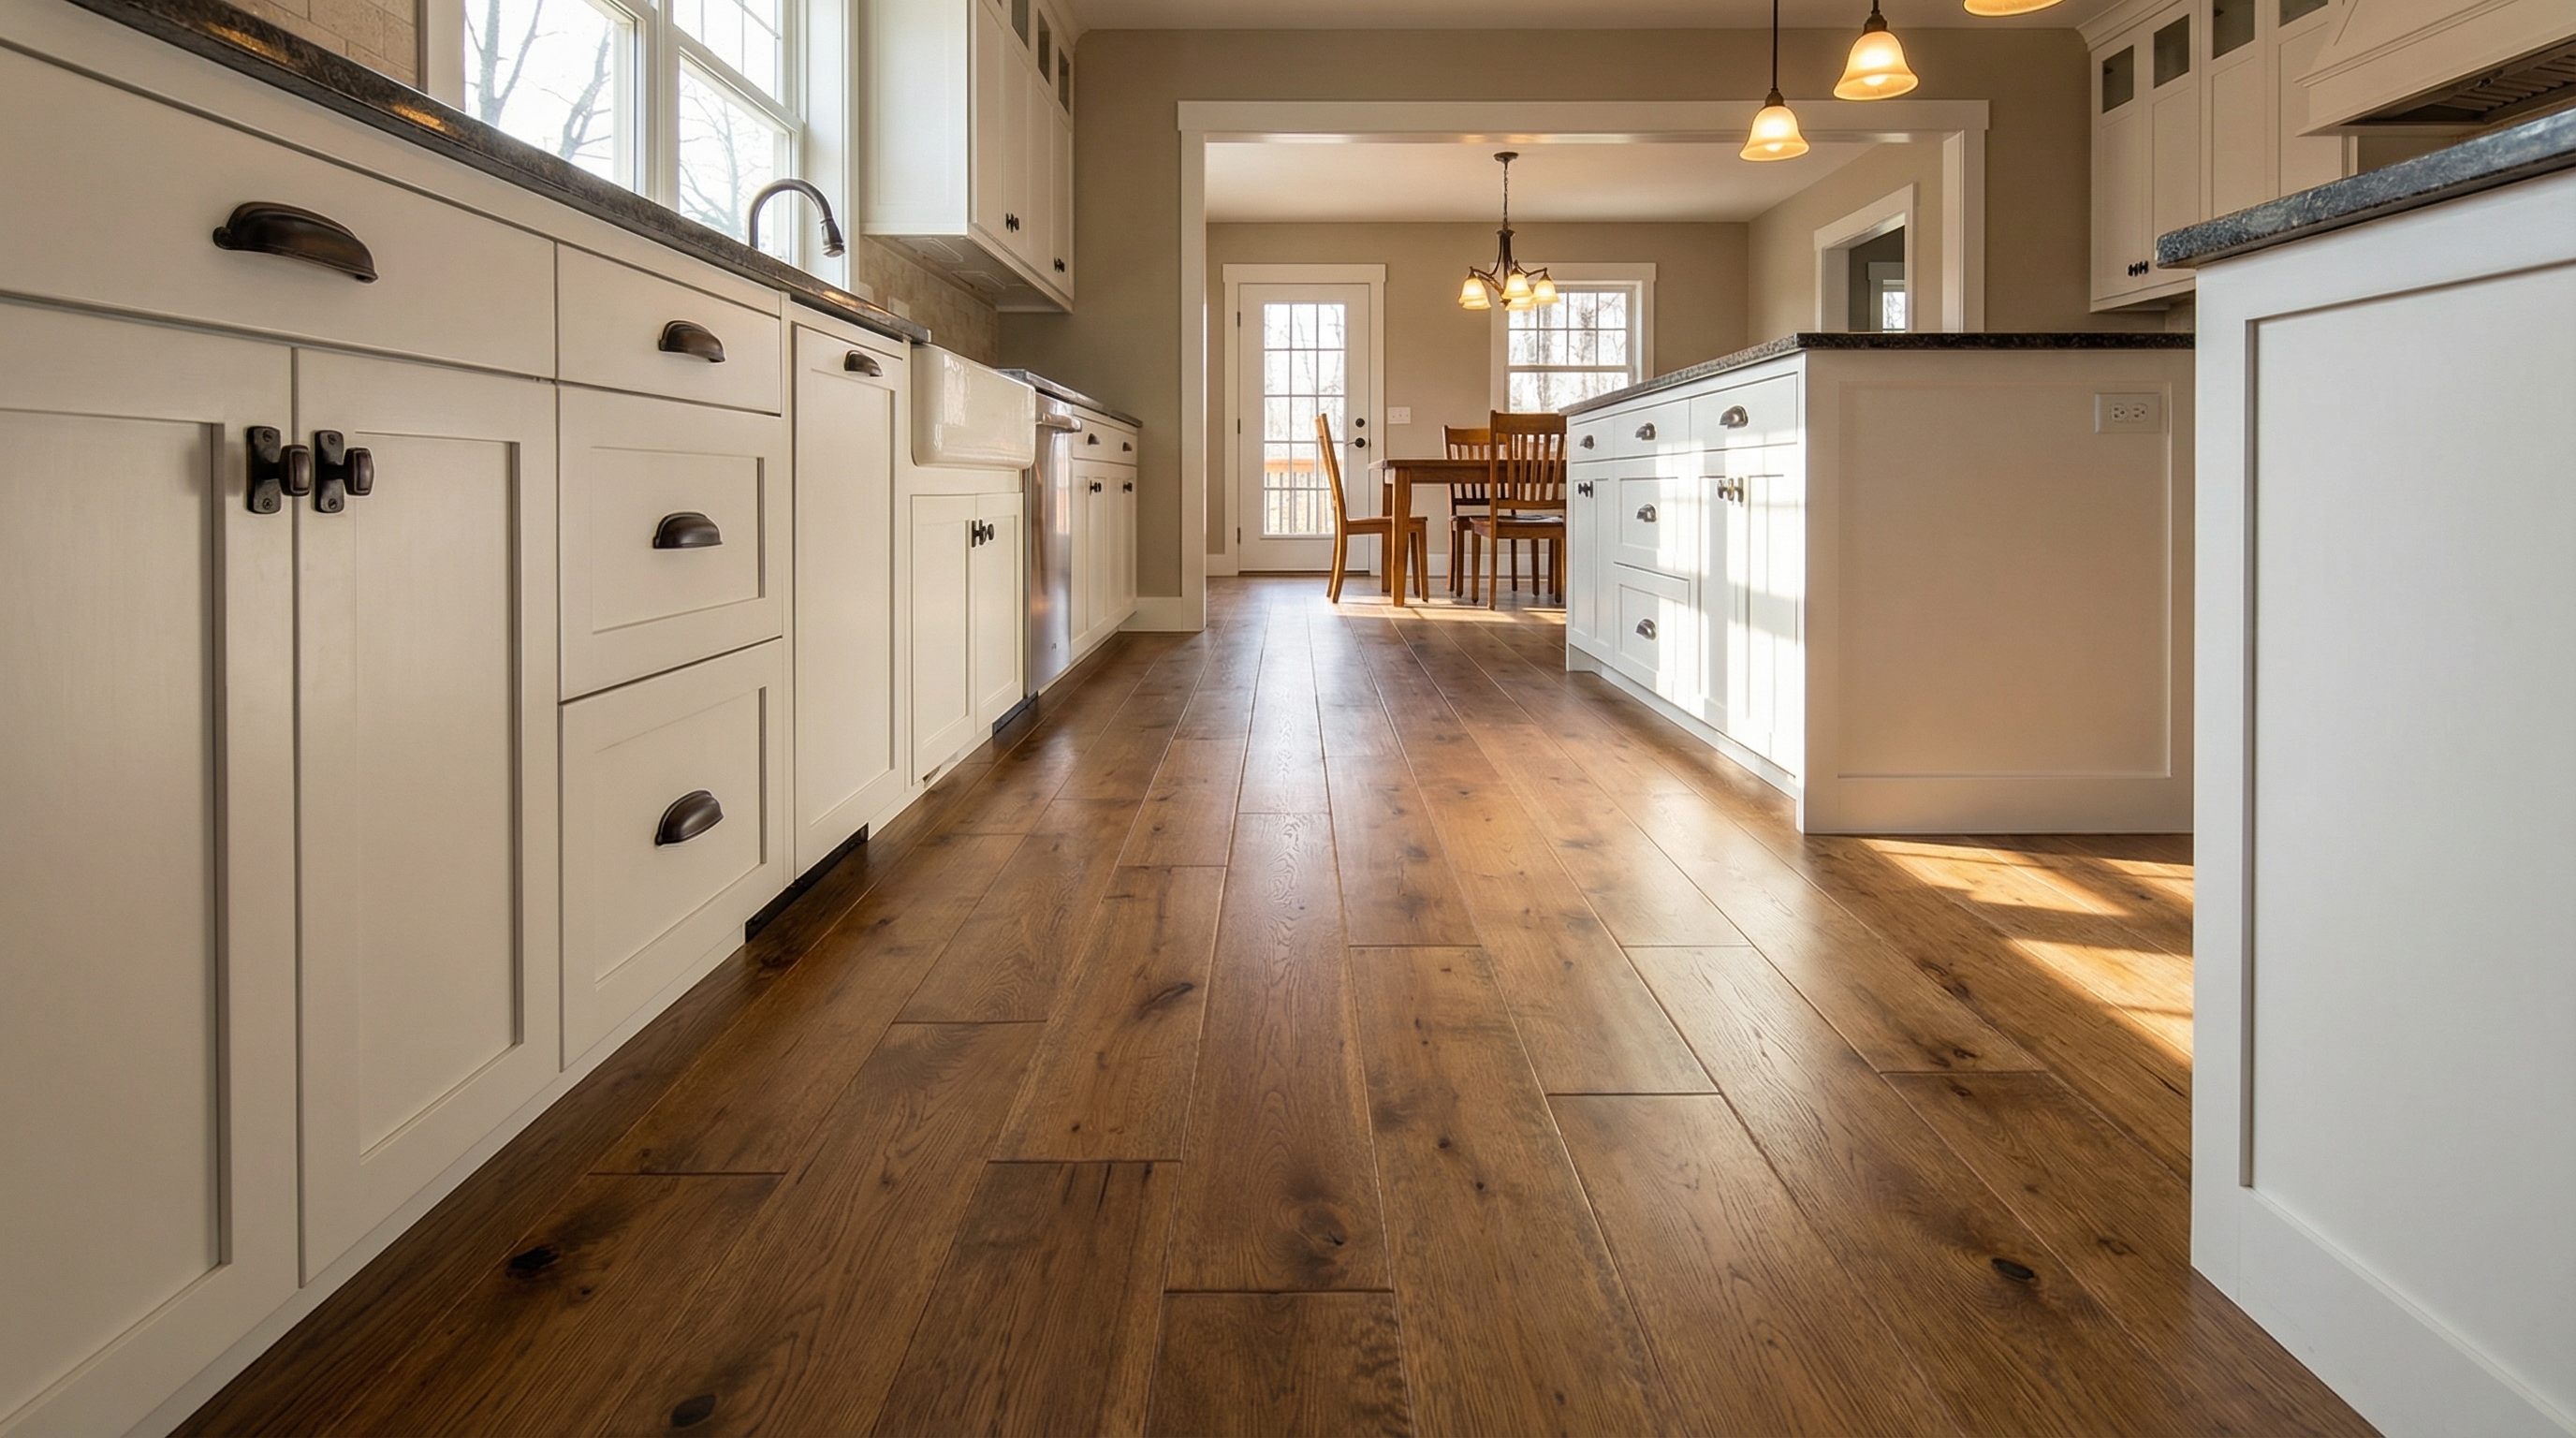
I need to say this clearly: do not install solid hardwood in a Pacific Northwest kitchen. I’ve torn out too many solid hardwood kitchen floors that cupped, gapped, or buckled from moisture. Our humidity swings from about 35% in summer to 65%+ in winter. Solid wood can’t handle that range in a room where you also deal with dishwasher leaks, sink splashes, and cooking steam.
Engineered hardwood with a plywood core is the right approach if you want a real wood floor in your kitchen.
Here’s what it costs installed in Pierce County:
-
Entry-level: $8 - $13 per square foot. Bruce Hydropel and Pergo TimberCraft. Good moisture resistance, 2-3mm wear layer, and click-lock installation that any experienced installer can handle in a day.
-
Mid-range: $10 - $15 per square foot. Shaw Floorte Hardwood and Kahrs Original. Stable in PNW humidity, thicker wear layers, and wider plank options that show off the wood grain.
-
Premium: $14 - $20 per square foot. Mirage Engineered. Canadian-made, 6mm wear layer you can refinish twice, and very popular in Craftsman-style homes across Tacoma and South Hill.
One thing to verify before buying: check the core material. Some budget engineered hardwood uses OSB (oriented strand board) instead of plywood. OSB swells more in humid conditions. In Pierce County, where crawlspace moisture is a constant factor, plywood-core engineered hardwood is the only type I recommend for kitchens.
Even engineered hardwood requires more daily care than LVP or tile. Wipe up spills right away. Don’t let water pool around the dishwasher. And if the supply line leaks while you’re at work, expect damage. I lay out the full trade-off in my materials selection guide, and flooring is one of the biggest decisions you’ll make.
Budget Options That Still Hold Up
Not every kitchen remodel needs a $2,000+ floor. If you’re updating a rental, prepping a home for sale, or keeping the overall kitchen remodel budget tight, a few options look decent and hold up at a lower price.
Sheet vinyl runs $3 to $7 per square foot installed. Modern sheet vinyl from Congoleum and Tarkett prints cleaner than the stuff from the 1990s. It goes down fast, feels warm underfoot, and handles water. For a 150-square-foot kitchen, you’re looking at $450 to $1,050 total. Hard to beat on a tight budget.
Cork with a WPC core (like Wicanders Hydrocork) runs $9 to $13 per square foot installed. Cork gives you a warm, slightly cushioned surface that’s comfortable for long stretches of standing. Regular cork is NOT waterproof, so only WPC-core cork products belong in a kitchen. Standard cork in a PNW kitchen will absorb moisture and fail.
A note on laminate. I’m mentioning it because people ask about it constantly, but I’ll be straight: I don’t recommend laminate for kitchens. It looks similar to LVP on the shelf, and homeowners confuse them all the time. The difference is that laminate has an HDF core that swells at the seams when water reaches it. Even if the label says “water resistant,” laminate fails at the dishwasher and sink over time. For $1 to $2 more per square foot, LVP gives you a truly waterproof floor. Choose LVP. Every time.
What Your Subfloor and Crawlspace Add to the Cost
This is where homeowners get blindsided. You pick your flooring, you get a price per square foot, and you think the budget is set. Then your contractor opens the kitchen and finds problems underneath.
In Pierce County, subfloor issues show up constantly. Homes from the 1940s through 1980s almost always have one or more of these conditions:
-
Diagonal board subfloors (1x6 planks laid at 45 degrees). Common in pre-1960s homes. Tile requires a cement board overlay on top, adding $1.50 to $2.50 per square foot. LVP needs 1/4-inch underlayment to bridge the gaps between planks.
-
Particleboard or OSB subfloors that swell from moisture. Very common in Lakewood, Graham, and Parkland homes from the 1970s and 1980s. Soft or swollen sections need replacement at $2 to $5 per square foot before any new flooring goes down.
-
Uneven settling. Self-leveling compound costs $2 to $4 per square foot installed. Tile demands a flat surface with no more than 3/16 inch of variance over 10 feet. This cost shows up on nearly every tile job in an older Pierce County home.
-
Degraded crawlspace vapor barriers. WA code requires a 6-mil poly vapor barrier in crawlspaces. Many older homes have torn or missing barriers, which pushes moisture straight up through the subfloor. Your contractor should test subfloor moisture with a pin meter before installation. Acceptable reading: under 12%. Above 14%: fix the crawlspace first, or your new floor will fail within a few years regardless of what material you pick.
The Hidden Line Items Nobody Budgets For
When you get a flooring estimate, make sure these show up as separate line items. If they don’t, ask why.
- Demo and removal of existing flooring: $1 - $3/sq ft (tile demo: $2 - $4/sq ft)
- Disposal of old material: $75 - $200
- Subfloor inspection and moisture testing
- Subfloor leveling or repair: $0 - $750 depending on condition
- Transition strips between rooms: $150 - $400 total
- Door undercutting (new floor raises height 1/4” to 1/2”): $25 - $75 per door
- Toe kick trim at cabinets: included in most installs, but verify
I include every one of these as a line item in my estimates. No surprises. If someone were working on my mom’s kitchen, I’d want to see every cost spelled out before the first piece of old flooring came up. That’s how I run my projects.
A Kitchen Flooring Project I Finished Last Month in Bonney Lake
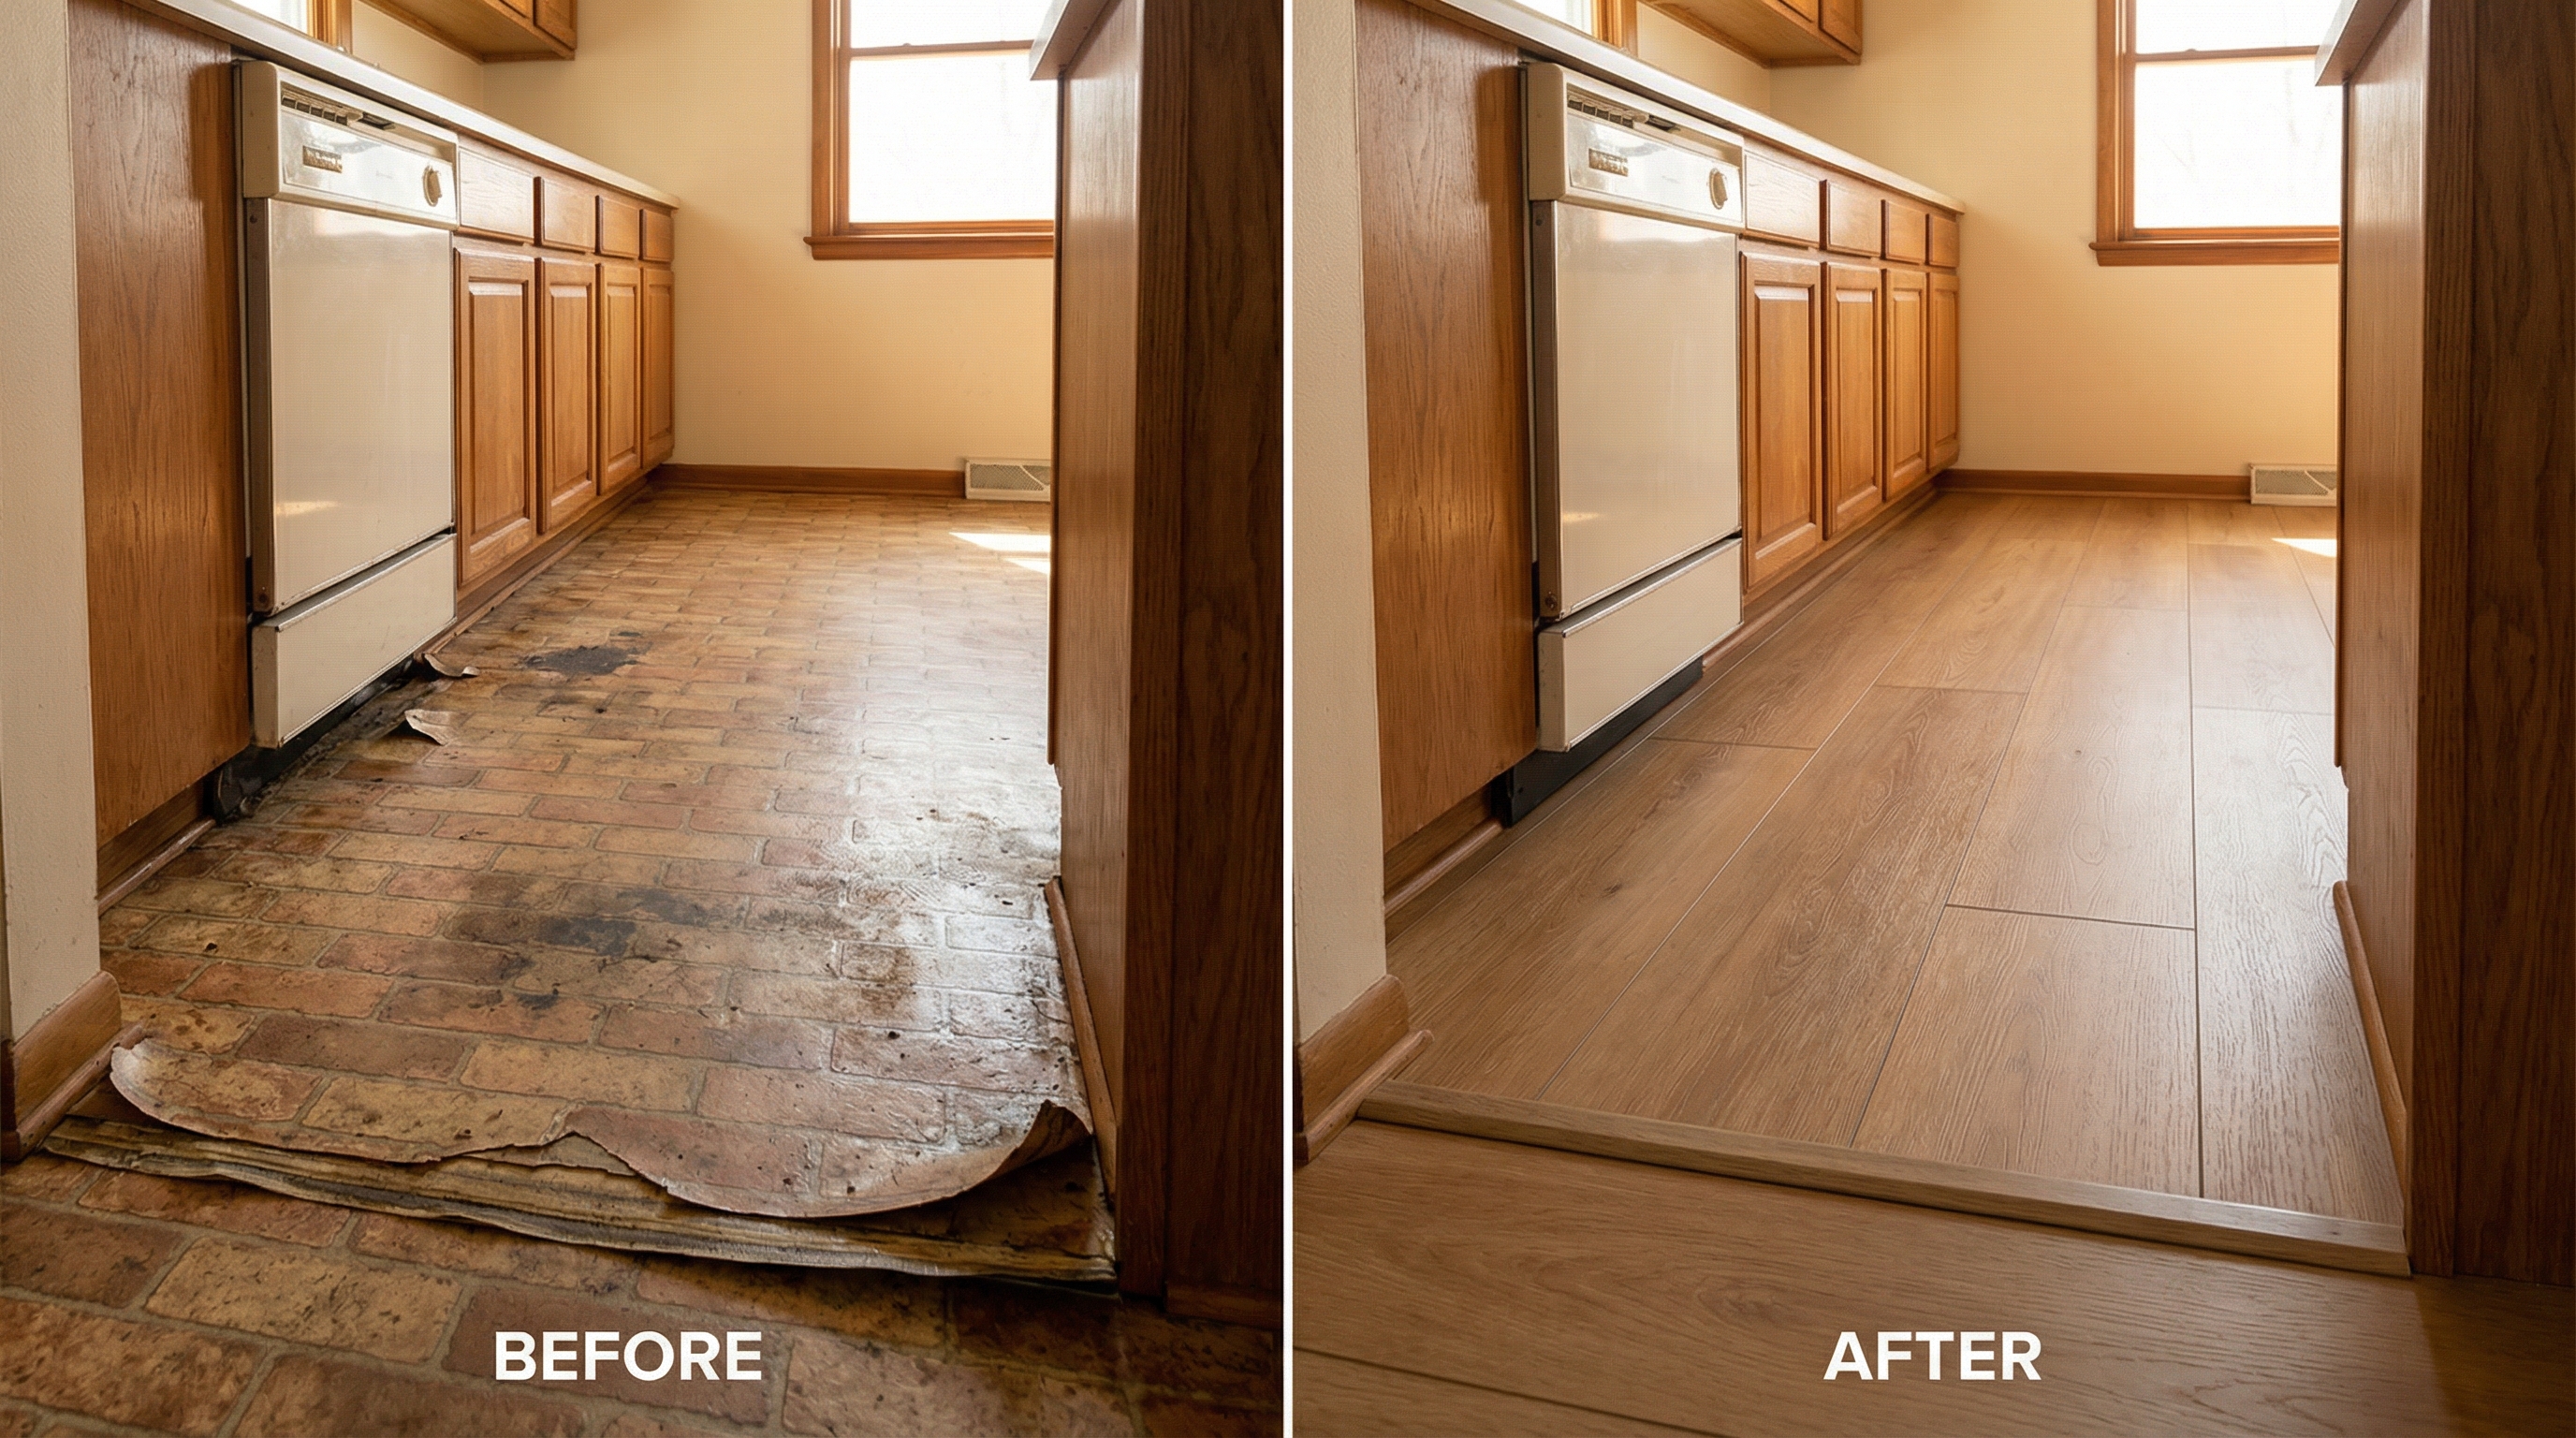
A family in Bonney Lake called me about replacing the kitchen flooring in their 1978 split-level. They had the original sheet vinyl. 46 years old. Peeling at the seams and lifting near the dishwasher.
The kitchen measured 165 square feet. When my crew pulled the old vinyl, we found two more layers underneath: a 1990s peel-and-stick tile over the original 1978 vinyl. Below all of that, the particleboard subfloor had moisture damage near the sink and dishwasher.
Here’s the actual cost breakdown from that project:
| Item | Cost |
|---|---|
| Demo (3 layers of flooring) | $495 |
| Disposal | $150 |
| Subfloor repair (12 sq ft of damaged particleboard) | $380 |
| Self-leveling compound (full kitchen) | $520 |
| LVP material (Shaw Floorte Alto 20-mil, 180 sq ft with waste) | $990 |
| LVP installation | $580 |
| Transitions to hallway and dining room | $185 |
| Door undercutting (3 doors) | $150 |
| Total | $3,450 |
Timeline: 3 days. Day one for demo and subfloor work. Day two for the leveling compound to cure. Day three for LVP installation, transitions, and trim.
The homeowner originally budgeted $1,500 based on the LVP material cost alone. The subfloor repair and leveling added $900 she didn’t expect. That’s not unusual for a 1970s Pierce County home, and it’s exactly why I inspect the subfloor before quoting a final number. If I had given that family a price without looking underneath first, one of us would eat that $900 difference. And it wouldn’t be the homeowner, because that’s not how I do business.
If your home falls into a similar age range, expect the subfloor to need some attention. My kitchen remodel timeline post covers the full sequencing so you know what happens and when.
Mistakes I See Homeowners Make With Kitchen Flooring
After hundreds of flooring installs across Pierce County, the same errors show up again and again.
Installing laminate instead of LVP. They look almost identical on the shelf. The price is close. But laminate swells and fails at every water exposure point. I’ve replaced laminate kitchen floors that lasted under 3 years because the dishwasher dripped or the sink supply leaked. Every single time, the homeowner tells me the same thing: “I thought it was waterproof.” It wasn’t. LVP is.
Skipping the subfloor moisture test. The test takes five minutes with a pin meter. Skipping it can cost thousands. If your contractor doesn’t test before installing, find out why.
Choosing small tile. 4x4 and 6x6 tile formats belong in 2004. In 2026, 12x24 is the minimum I recommend. Larger tiles mean fewer grout lines. Fewer grout lines mean less maintenance and a cleaner look. Buyers in the $450K to $600K range expect updated, large-format flooring when they walk through a home on South Hill or in Sumner.
Picking white grout for a kitchen. I covered this above, but it deserves repeating. White grout yellows and browns within months from cooking steam and PNW humidity. Go with medium gray.
Getting the installation sequence wrong in a full remodel. Flooring goes in after cabinets and before appliances. Reverse that order and you get gaps at toe kicks or scuffed floors from dragging a 300-pound refrigerator across your brand-new LVP. If you’re planning a complete kitchen remodel, the sequence matters as much as the materials.
Ignoring open-concept transitions. If you’re removing a wall to open up your kitchen, run continuous flooring through the entire main floor. It reads as a bigger space and costs less per square foot because contractors give better rates on larger jobs. A single 800-square-foot LVP project runs 10 to 20% cheaper per square foot than a kitchen-only 150-square-foot job. Plan the flooring for the whole space, not just the kitchen.
Questions I Get Asked About Kitchen Flooring
What is the best kitchen flooring for Pacific Northwest homes?
LVP with a 20-mil wear layer and SPC core. It handles crawlspace moisture, daily kitchen spills, and the humidity swings between our dry summers and wet winters without expanding, contracting, or growing mold. If your budget allows more and you want a floor that lasts 50+ years, porcelain tile with epoxy grout is the premium path. Both options handle everything the PNW throws at them, so it comes down to budget and preference.
How much does it cost to replace kitchen flooring in Puyallup?
For a typical 150-square-foot kitchen in Pierce County: LVP runs $900 to $1,950 installed, porcelain tile runs $1,350 to $3,300, and engineered hardwood runs $1,200 to $2,700. Add $150 to $600 for demo of the old floor and $150 to $750 for subfloor prep if your home needs it. Most homes here that predate 1985 need some amount of subfloor work, so budget for it.
Do I need to remove my cabinets to replace kitchen flooring?
Usually not. Most contractors float or glue new flooring up to the cabinet toe kicks and finish with trim. The exception is when the subfloor under the cabinets needs repair or leveling, which sometimes means pulling the base cabinets. That adds $400 to $1,200 to the project. I’ll know whether your cabinets need to come out after inspecting the subfloor, and I’ll tell you before we start.
Does new kitchen flooring increase my home’s value?
Yes, but the material you pick matters. Real estate agents in the Puyallup and South Hill market consistently tell me that updated kitchen flooring (wide-plank LVP or large-format porcelain) ranks in the top 3 visual factors during showings. Worn, outdated, or damaged flooring turns buyers off faster than almost anything else in a kitchen. A $2,000 flooring upgrade can help you sell faster and avoid price negotiations. I wrote a separate post on which kitchen upgrades add the most resale value if you want the full picture.
Can I install kitchen flooring myself to save money?
LVP is the most DIY-friendly option. Click-lock planks don’t require glue, nails, or special tools. If your subfloor is clean, level, and dry, a handy homeowner can knock it out in a weekend. Tile is a different story. Tile installation requires cement board, thinset, precise cuts, grout, and exact leveling. I’ve fixed more DIY tile jobs than I can count. The savings from doing it yourself disappear when tiles crack, grout fails, or the floor turns out uneven. If you’re going with tile, hire someone who does it every day.
Picking the Right Floor for Your Kitchen
Here’s the short version based on everything I’ve covered:
- Best overall value: LVP with 20-mil wear layer, SPC core ($9 - $13/sq ft installed)
- Longest lifespan: Porcelain tile with epoxy grout ($9 - $22/sq ft installed)
- Real wood look and feel: Engineered hardwood, plywood core ($8 - $18/sq ft installed)
- Tightest budget: Sheet vinyl ($3 - $7/sq ft installed)
- Do not install in a PNW kitchen: Solid hardwood or laminate
If you’re doing a bigger kitchen renovation, flooring typically runs 5 to 10% of your total budget. That’s a relatively small slice, but it’s the surface you stand on every day and the first thing people notice when they walk into the room. Get it right and the rest of the kitchen builds on a solid foundation. Get it wrong and you’ll tear it up in 3 years. I’ve seen both outcomes, and I’d rather steer you toward the first one.
I’ve completed kitchen flooring and full kitchen remodeling projects across Pierce County, including Tacoma, Bonney Lake, Edgewood, Sumner, Lake Tapps, Lakewood, and Milton. Same quality. Same honest pricing. Same attention to what’s under the floor, not just on top of it.
Get a Straight Answer on Your Kitchen Floor
If you’re ready to replace your kitchen flooring, or you’re planning a larger kitchen remodel in Puyallup, I’ll give you an honest estimate with every cost broken out line by line. No hidden fees. No surprise charges after demo day.
Call me at (253) 392-9266 or fill out our contact form to schedule a free in-home consultation. I’ll look at your subfloor, measure the space, and tell you exactly what your kitchen floor will cost before you commit to anything.
Brad Zemke, Owner Pacific Remodeling LLC Puyallup, WA