Last month I sat at a kitchen table in Bonney Lake with a couple who had been arguing about their flooring choice for three weeks straight. She wanted luxury vinyl plank in the kitchen because her friend had it installed and loved it. He wanted hardwood throughout the whole main floor because his parents’ oak floors still looked great after 40 years. Neither one was wrong. They just needed someone who installs both to lay out the facts without a sales pitch attached.
That conversation happens in almost every kitchen remodel I do. Flooring is one of the first decisions homeowners make, and it’s also one of the most debated. LVP and hardwood are the two most popular options I install across Pierce County, and they both have real strengths. But they’re not interchangeable. Where you put them matters just as much as which one you prefer.
I’ve been in the trades for over 20 years and I’ve installed flooring in every climate from Hawaii to Alaska to the Pacific Northwest. I’ve pulled up hardwood that buckled from a dishwasher leak after six months. I’ve also walked on 60-year-old oak floors that looked better than anything new on the market today. Both of those things are true, and both matter when you’re making this decision.
The Full Comparison at a Glance
Before we get into the details, this table gives you the quick version. Every number here comes from what I actually see on jobs in the Puyallup area, not from national averages or manufacturer marketing.
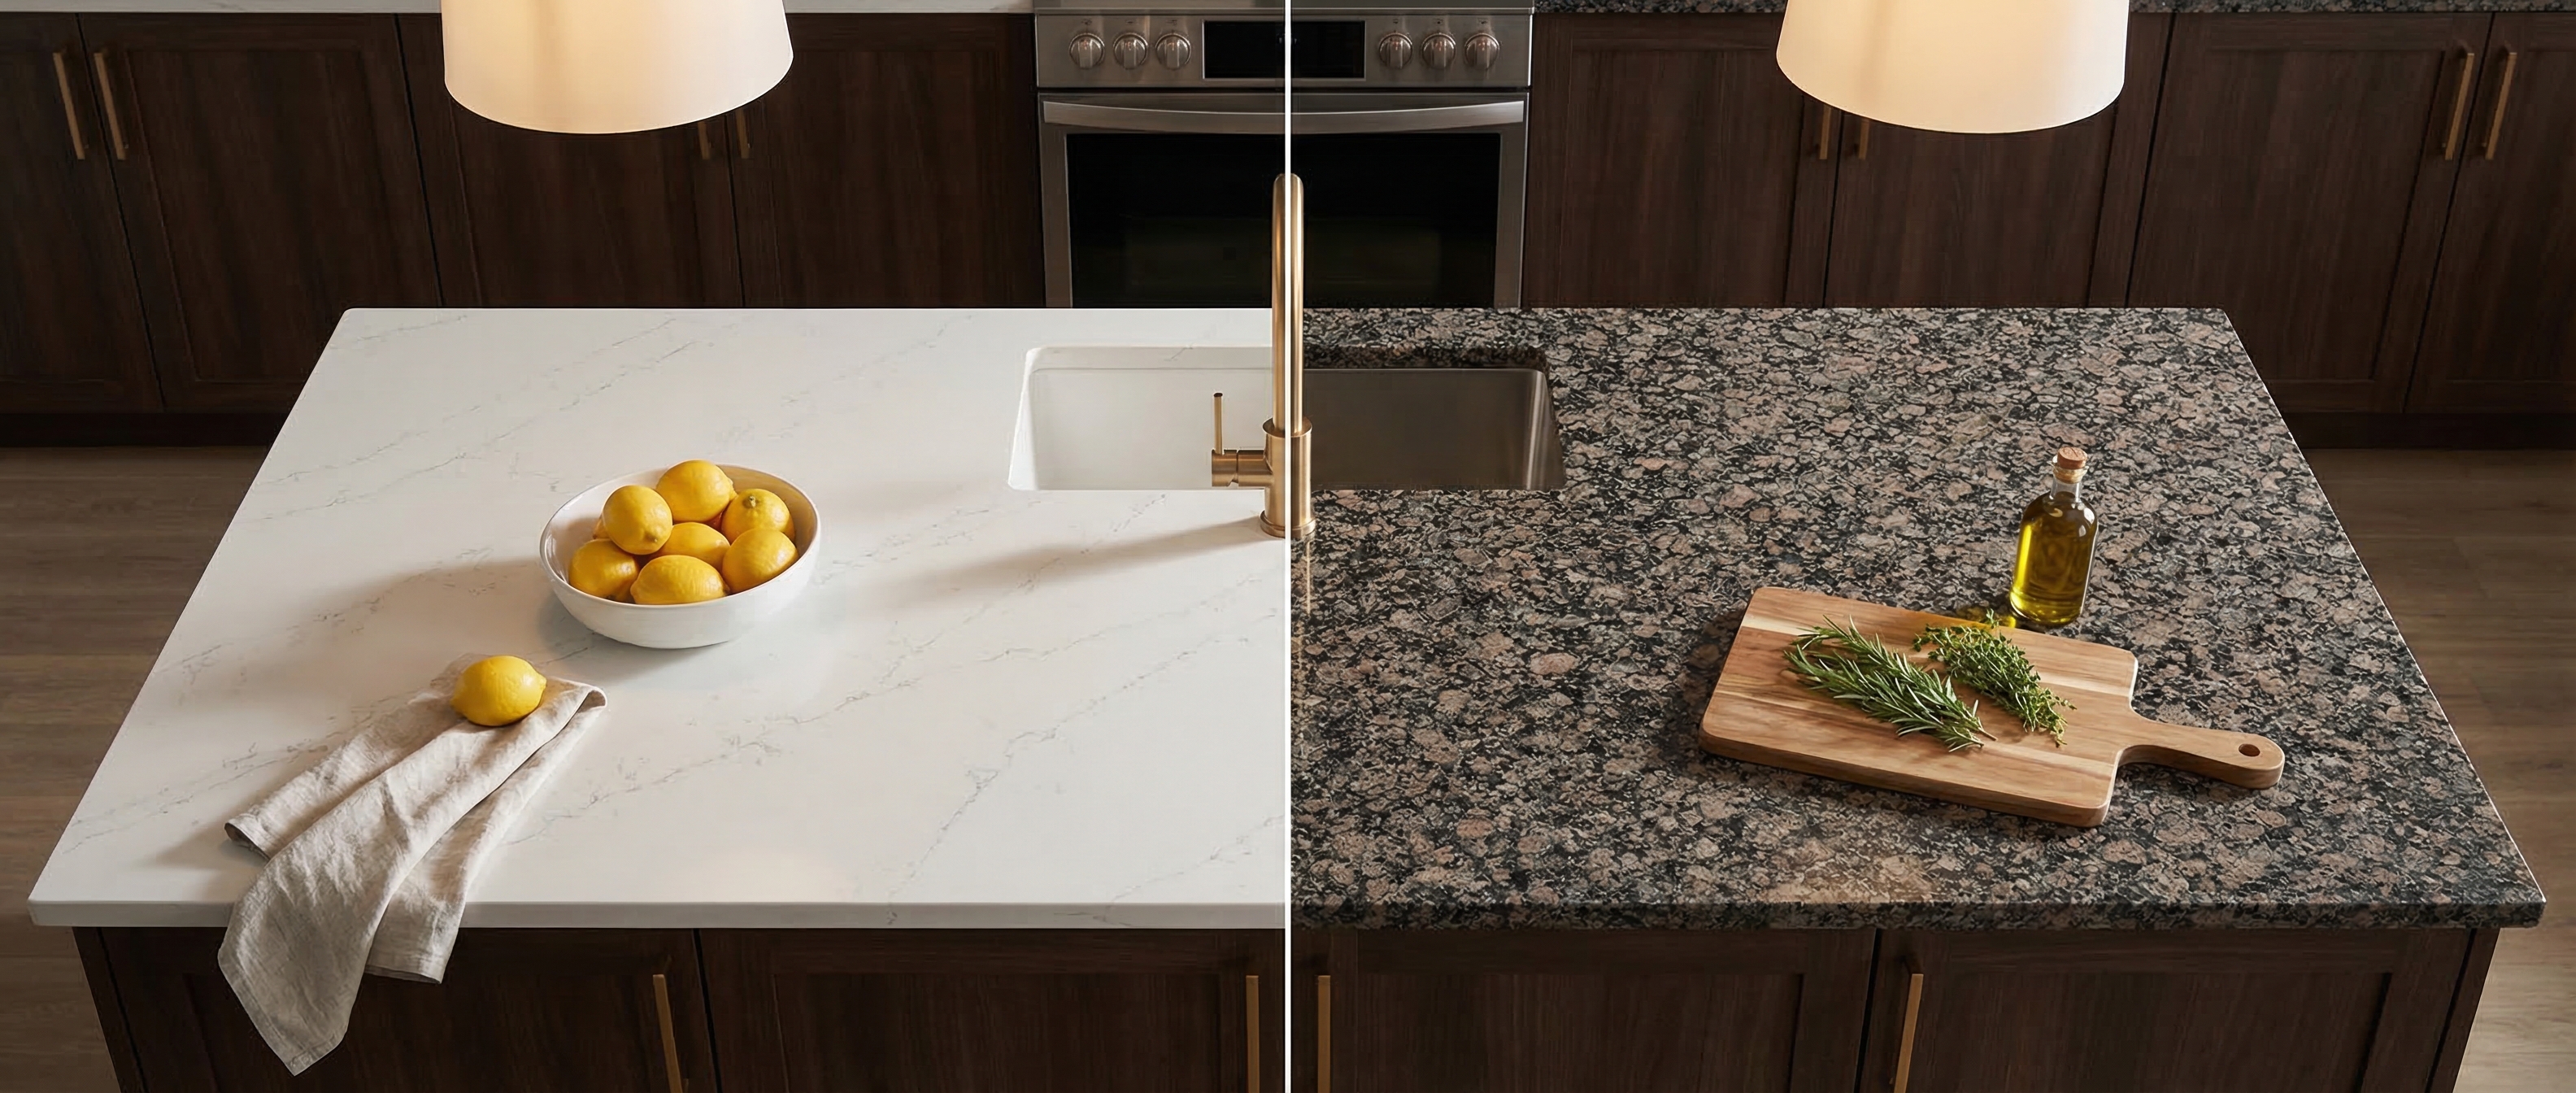
| Factor | LVP (Luxury Vinyl Plank) | Hardwood |
|---|---|---|
| Cost installed | $3 - $8 per sq ft | $8 - $15 per sq ft |
| Typical kitchen (200 sq ft) | $600 - $1,600 | $1,600 - $3,000 |
| Water resistance | Fully waterproof | Damaged by standing water |
| Durability | 15 - 25 year lifespan | 50 - 100 years (refinishable) |
| Maintenance | Sweep and mop | Refinish every 7 - 10 years |
| Feel underfoot | Softer, warmer | Solid, natural |
| Resale value | Neutral to slight positive | Strong positive |
| Installation time | 1 - 2 days for a kitchen | 3 - 5 days for a kitchen |
| Best rooms | Kitchens, bathrooms, basements | Living rooms, dining rooms, bedrooms |
Those numbers tell the story pretty clearly, but the details behind them matter. Let me walk you through each flooring type so you can see why those numbers look the way they do.
What LVP Actually Is (and Why It Took Over)
Luxury vinyl plank is not your grandmother’s vinyl. That’s the first thing I tell homeowners, because a lot of people still picture those thin, peeling sheets from the 1990s. Modern LVP is a multi-layer engineered plank that clicks together and floats over your existing subfloor. It looks remarkably like real wood. Some of the higher-end products fool contractors at first glance, and I’m not exaggerating.
Here’s how an LVP plank is built, from top to bottom:
- Wear layer. This is the clear protective coating on top. Thickness ranges from 6 mil on budget products to 22 mil on commercial-grade planks. Thicker wear layer means more scratch and scuff resistance. For a kitchen, I recommend at least 12 mil.
- Design layer. A high-resolution printed image of wood grain. The good brands use dozens of different patterns so the floor doesn’t look like the same plank repeated 200 times.
- Core layer. This is the structural heart of the plank. The two types that matter are SPC (stone polymer composite) and WPC (wood polymer composite). I’ll explain the difference in a moment.
- Attached underlayment. Premium LVP comes with a built-in pad on the bottom. Saves a step during install and gives you a softer, quieter floor.
SPC vs. WPC: Which Core Matters
SPC and WPC are marketing terms you’ll see on every box at the flooring store, and most homeowners have no idea what the difference is. Here’s the plain version.
SPC (Stone Polymer Composite) uses a core made from limestone powder and PVC. It’s denser, thinner, and more rigid. SPC handles temperature changes better, sits flatter on imperfect subfloors, and works well over concrete slabs. It’s also slightly less comfortable underfoot because that rigid core doesn’t give as much. For kitchens and bathrooms, SPC is usually my first recommendation.
WPC (Wood Polymer Composite) uses a foamed core that’s thicker and softer. It feels more cushioned when you walk on it, absorbs sound better, and is more comfortable for long periods of standing. The tradeoff is that WPC planks are thicker (usually 6 to 8 mm versus 4 to 6 mm for SPC), so you need to account for that at door transitions and thresholds. WPC works great in living rooms, bedrooms, and basements where comfort is the priority and moisture exposure is lower.
Both are 100% waterproof. Both click-lock together. Both float over the subfloor without nails or glue. The choice comes down to where you’re putting the floor and what matters more: rigidity and durability, or comfort and sound absorption.
Thickness Tells You the Tier
This is something I wish more homeowners understood before they started shopping. LVP thickness is the single fastest way to gauge quality.
- 4 mm or less. Budget tier. You’ll find this at big box stores for under $2 per square foot. It gets the job done in a rental or a low-traffic room, but it dents easily, feels thin underfoot, and the click-lock joints are more likely to separate over time. I don’t install this in kitchens.
- 5 to 6 mm. Mid-range. This is the sweet spot for most homeowners doing a kitchen or bathroom remodel. Solid performance, decent feel, and the price stays reasonable at $3 to $5 per square foot for material.
- 7 to 8 mm with attached pad. Premium tier. This is what I install on higher-end jobs where the homeowner wants LVP that genuinely feels substantial underfoot. Usually runs $5 to $8 per square foot for material. At this thickness with a quality attached underlayment, you get real sound dampening and a floor that doesn’t feel hollow when you walk on it.
Brands I Install and Trust
I’m not here to sell you a specific brand, but I’ll tell you which ones I’ve installed enough times to stand behind.
COREtec. This is the brand that basically invented the SPC category. Their Plus and Pro Plus lines are my go-to for kitchen and bathroom installs. The attached cork underlayment is excellent, and the click-lock system is the most reliable I’ve worked with. I’ve never had a callback on a COREtec floor.
Shaw Floorte. Shaw makes solid mid-range to premium LVP. Their Pro series (7 mm SPC with attached pad) installs clean and holds up well. Good selection of colors and wood-grain patterns. Shaw also backs their products with strong warranties, which matters if something goes wrong down the line.
LifeProof. Home Depot’s house brand, and it’s better than you might expect. The 8.7 mm WPC planks with sealed edges are a solid budget-to-mid option. I’ve installed LifeProof in several kitchens and rentals with good results. Not the thickest wear layer in the category, but the price is hard to beat.
Why LVP Dominates Kitchen and Bathroom Remodels Now
Five years ago, I installed hardwood in about half of my kitchen remodels. Today that number is closer to 15%. The shift happened fast, and it happened because LVP solved the two biggest problems with kitchen flooring: water damage and cost.
Kitchens get wet. Constantly. The sink splashes. The dishwasher leaks. Kids spill juice. The dog’s water bowl overflows. Someone mops with too much water and it pools in the corners. Every one of those scenarios can damage hardwood. None of them can damage LVP.
Cost matters too. When a homeowner is spending $45,000 or more on a kitchen remodel, saving $1,000 to $2,000 on flooring means that money can go toward better countertops, upgraded appliances, or nicer cabinet hardware. LVP gives you a floor that looks great, performs well in wet conditions, and keeps the overall project budget under control.
That’s not a sales pitch. That’s just math.
Pro Tip: When shopping for LVP, check the wear layer thickness first. Anything under 12 mil belongs in a closet, not a kitchen. For kitchens and high-traffic areas, 12 mil is the minimum I recommend. 20 mil is the sweet spot for long-term performance.
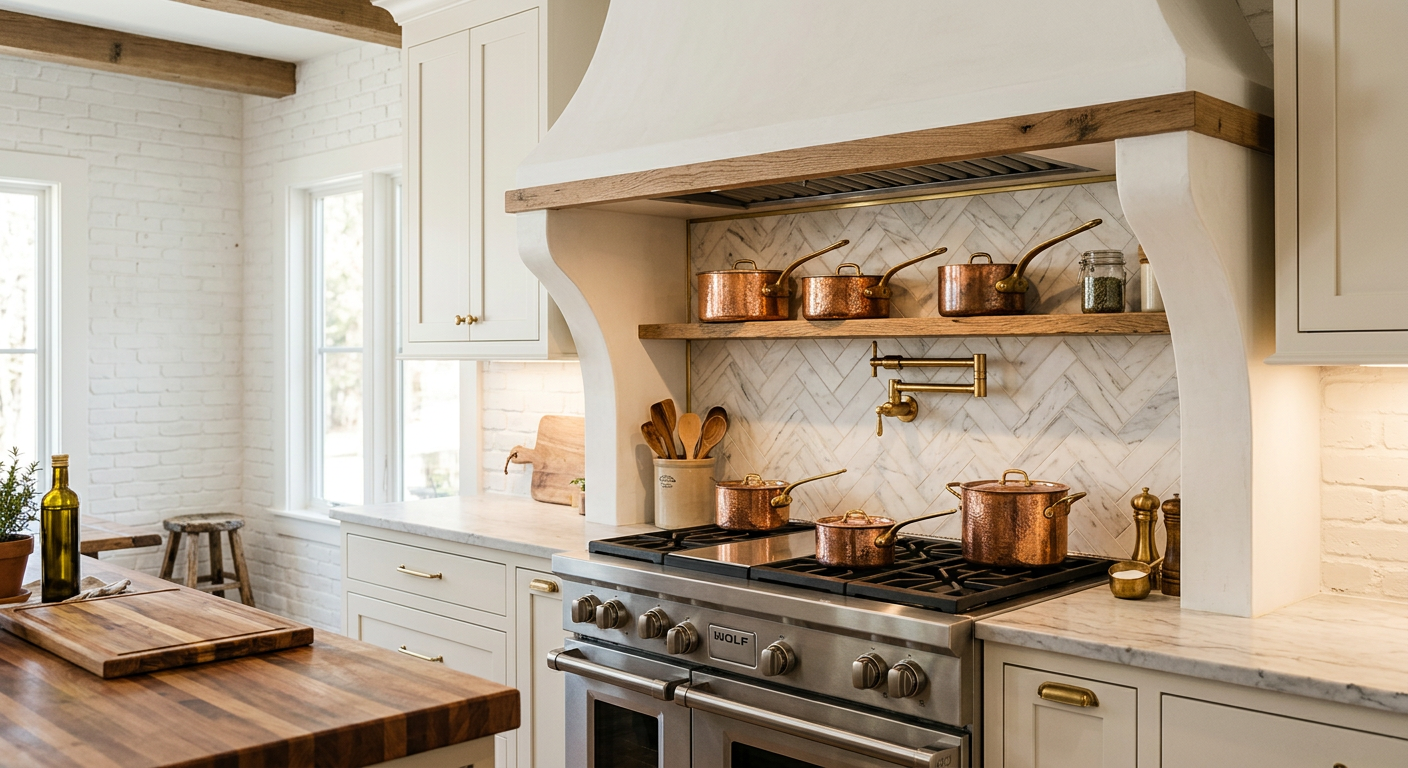
Hardwood: Still the Gold Standard for a Reason
I don’t want anyone reading this to think I’m anti-hardwood. I’m not. I love hardwood floors. I grew up in a house with red oak floors that my grandfather installed, and those floors are still there today, still beautiful, 50-plus years later. Hardwood has qualities that no synthetic product can match, and for the right rooms, it’s worth every dollar.
Solid Hardwood vs. Engineered Hardwood
This distinction matters a lot, especially in the Pacific Northwest.
Solid hardwood is exactly what it sounds like: a single piece of wood, usually 3/4 inch thick, milled with a tongue-and-groove edge and nailed to a plywood subfloor. It’s the traditional option. You can sand and refinish solid hardwood multiple times over its lifespan, which is why those floors last 50 to 100 years. The downside is that solid wood expands and contracts with humidity changes, and it’s very sensitive to moisture. In the PNW, where we get rain eight months out of the year and humidity swings from 40% in summer to 80% in winter, solid hardwood can gap, cup, and buckle if the home’s climate isn’t well controlled.
Engineered hardwood is a real wood veneer (usually 2 to 6 mm of the actual wood species) glued on top of a plywood or HDF base made from multiple cross-grain layers. The layered construction makes it more dimensionally stable, meaning it handles humidity fluctuations much better than solid wood. For Pacific Northwest homes, engineered hardwood is almost always the smarter choice over solid. You still get the look and feel of real wood, but the floor is less likely to move and gap with our seasonal moisture swings.
Engineered hardwood can be refinished too, though fewer times than solid. A plank with a 4 mm veneer handles 2 to 3 refinishing cycles before you’re through the real wood layer. That’s still 30 to 50 years of life if you take care of it.
Species and What They Cost
Not all hardwood costs the same. Species affects the price, the hardness, and the look. Here’s what I install most often and what you’ll spend on material before labor:
- White oak. The most popular species right now by a wide margin. Natural grain looks great in contemporary and traditional spaces alike. $5 to $9 per square foot for material. Janka hardness of 1,360, which means it handles foot traffic well.
- Red oak. A classic that’s been in American homes for a century. Warmer tones, more pronounced grain pattern. $4 to $7 per square foot. Slightly softer than white oak at 1,290 Janka.
- Maple. Light, clean, uniform grain. Popular in modern kitchens, though I rarely recommend hardwood in kitchens anyway (more on that soon). $5 to $8 per square foot. Very hard at 1,450 Janka.
- Hickory. The toughest domestic species you’ll commonly find. Wild grain variation, rustic character. $5 to $10 per square foot. Janka hardness of 1,820 makes it extremely dent-resistant.
- Walnut. Dark, rich, and expensive. Walnut floors make a statement. $7 to $14 per square foot for material. Softer at 1,010 Janka, so it dents easier than the other options.
Add $2 to $4 per square foot for professional installation on any of those species. That number includes subfloor prep, moisture testing, acclimation, installation, and finish work if you’re doing site-finished hardwood.
The Refinishing Advantage
Here’s the argument for hardwood that LVP can never match. When a hardwood floor gets scratched, dented, or worn over 7 to 10 years of life, you don’t rip it out. You sand it down and refinish it. The floor looks brand new again. You can do this 3 to 5 times with solid hardwood and 2 to 3 times with engineered.
Do the math on a white oak floor in a living room. Install it today for $10 per square foot. Refinish it in 10 years for $3 to $5 per square foot. Refinish again in 20 years. Refinish again in 30 years. That floor is now 30 years old, looks great, and you’ve spent roughly $20 per square foot total over three decades. Meanwhile, LVP would have been replaced at least once, possibly twice, in that same timeframe.
For rooms where water isn’t a daily concern, that long-term value proposition is real. It’s why I still recommend hardwood for living rooms, dining rooms, hallways, and bedrooms in homes where the budget supports it.
My Honest Take on Hardwood in Wet Areas
I won’t install hardwood in a bathroom. Period. I’ve seen what happens. Water gets behind the toilet seal. Kids leave the tub running. Steam from hot showers condenses on the floor. Hardwood and bathrooms are a bad combination, full stop.
Kitchens are a gray area. I’ve installed hardwood in kitchens, and most of those floors are fine years later. But “fine” is not “bulletproof.” Every one of those homeowners knows they need to wipe up spills immediately, put mats in front of the sink and dishwasher, and stay on top of their appliance maintenance. One dishwasher leak that goes unnoticed for 48 hours can buckle $3,000 worth of hardwood flooring. I’ve seen it happen twice in my career. Both times, the homeowner was devastated.
If you want hardwood in your kitchen and you understand the risk, I’ll install it for you and it will look incredible. But I’ll also tell you exactly what I’m telling you now: LVP gives you the look without the risk, especially in a room where water is everywhere.
From the Field: I’ve pulled up hardwood that buckled from a single dishwasher leak that went unnoticed for 48 hours. The repair cost more than the original floor installation. In a kitchen, LVP eliminates that risk completely.
What the Pacific Northwest Does to Your Floors
I bring this up with every flooring client because it’s the single biggest factor most homeowners overlook. We don’t live in Arizona. We live in the PNW, and our climate creates specific challenges for flooring that people in other parts of the country don’t deal with.
Rain, Mud, and the Front Door Problem
It rains here. A lot. From October through May, you’re tracking in water, mud, and grit every time you walk through the front door. If you have kids, that’s amplified. If you have dogs, multiply it again. I have clients in Puyallup with two golden retrievers who come in from the backyard like they just went swimming, and that’s just a regular Tuesday in November.
LVP handles this perfectly. Water sits on the surface, you wipe it up, and the floor is fine. Mud and grit sweep up easily. The wear layer resists scratching from dog nails and gravel tracked in on boots.
Hardwood handles it too, but you need to be more careful. A good-quality doormat, a consistent routine of wiping paws and kicking off shoes, and regular sweeping to prevent grit from scratching the finish. Most homeowners manage this fine. But if your household is more “chaos” than “order,” LVP in the entryway and mudroom will save you headaches.
Humidity and Seasonal Movement
The PNW has significant humidity swings. Summers drop below 40% relative humidity indoors. Winters push above 70% without a dehumidifier. That 30-point swing causes solid hardwood to gap in summer and cup in winter.
Engineered hardwood handles this better because the cross-grain plywood base resists expansion and contraction. But even engineered hardwood benefits from keeping your home between 35% and 55% humidity year-round with a humidifier in winter and a dehumidifier in summer.
LVP doesn’t care about humidity. Dimensionally stable in any normal residential environment. One less thing to think about.
Subfloor Conditions in Older PNW Homes
Here’s something most flooring articles written by people who’ve never pulled up a floor in the Pacific Northwest won’t tell you. A lot of homes in Pierce County were built in the 1950s, 1960s, and 1970s. Those homes have subfloor conditions that affect what you can install and how much prep work is needed.
Concrete slabs. Many older single-story homes and split-levels sit on concrete slabs. Concrete wicks moisture up from the ground, especially without a modern vapor barrier. You can install LVP directly over concrete with minimal prep. Hardwood over concrete requires either a plywood subfloor build-up or engineered hardwood with a specific moisture barrier system. That adds $2 to $4 per square foot in prep costs.
Uneven crawlspaces. Homes with crawlspaces often have subfloors that have shifted, sagged, or developed humps over 50 to 70 years. LVP is more forgiving of minor subfloor imperfections because the click-lock floating system distributes small variations across the floor. Hardwood, especially solid hardwood nailed to the subfloor, telegraphs every bump and dip. Leveling an old subfloor for hardwood can add a full day of labor and $500 to $1,500 in materials, depending on how bad it is.
Previous flooring layers. I’ve pulled up carpet in older PNW homes and found two or three layers of old vinyl, linoleum, or asbestos tile underneath. LVP can sometimes go directly over existing vinyl if it’s flat and well-adhered. Hardwood almost always needs a clean, level plywood subfloor to nail into.
My Standing Recommendation for PNW Homes
After installing flooring in hundreds of PNW homes, here’s my default recommendation. It’s not a rule, and every house is different, but this is the starting point I work from:
- Kitchens: LVP
- Bathrooms: LVP (no exceptions)
- Basements: LVP
- Entryways and mudrooms: LVP
- Living rooms, dining rooms, bedrooms: Hardwood if the budget supports it, LVP if it doesn’t
- Throughout the main floor (open concept): This is where it gets interesting. If you have an open kitchen-living-dining layout, you either run one material throughout or manage transitions between two. I often recommend a high-quality LVP that mimics white oak throughout the main floor for a consistent look and zero worry about water migration from the kitchen area.
PNW Recommendation: For open-concept homes, running one material throughout avoids awkward transitions between rooms. A premium 7-8mm LVP in a white oak pattern handles every room from the kitchen to the living room.
Room by Room: Where Each Flooring Wins
Let me break this down by specific room so you can map the decision directly to your home.
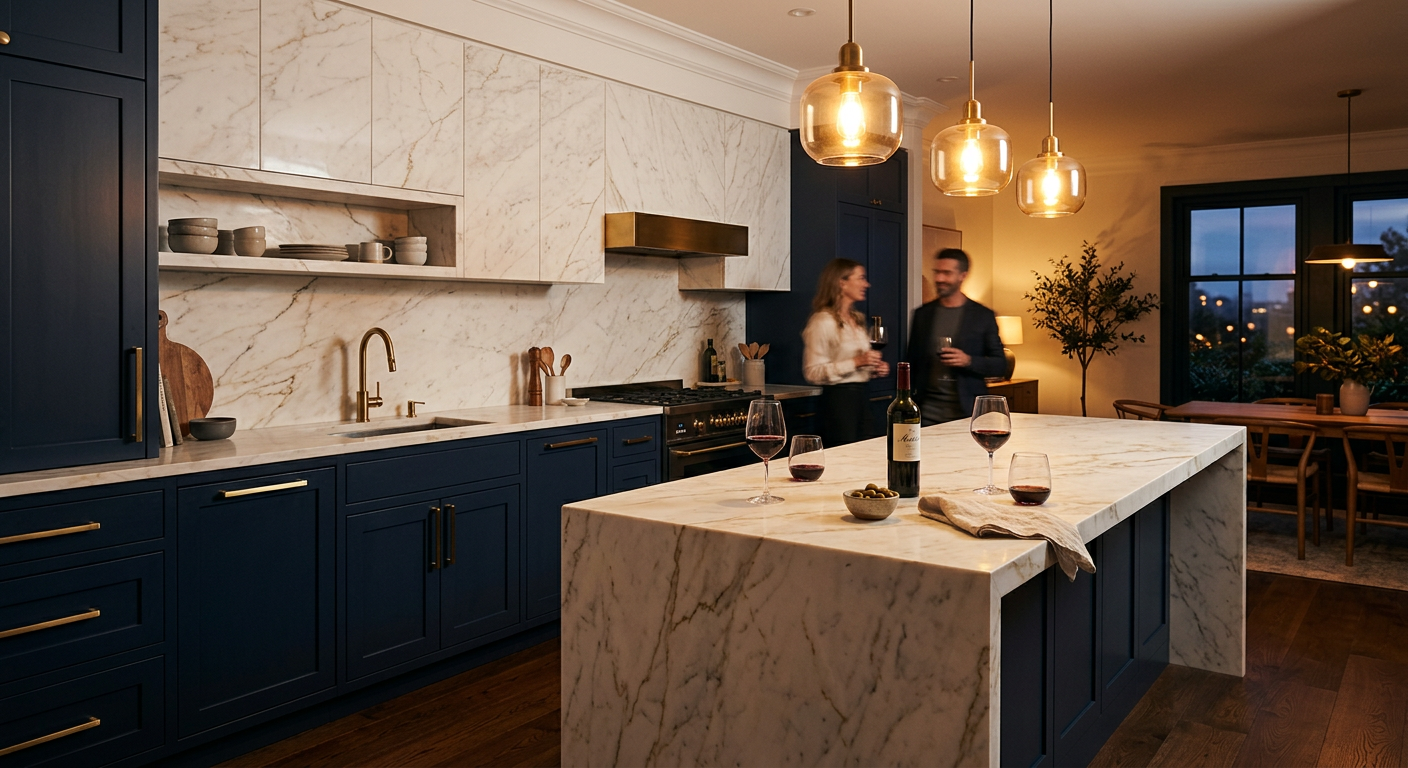
The Kitchen
LVP wins here, and it’s not close.
Your kitchen floor deals with more abuse than any other floor in the house. Water splashes from the sink 20 times a day. The dishwasher occasionally leaks. Someone drops a cast iron skillet and dents the floor. A bottle of olive oil shatters and coats three square feet. Kids spill milk and don’t tell you about it for six hours.
LVP handles all of that. Water sits on the surface and gets wiped up. The wear layer resists impact from dropped objects (though a cast iron skillet will dent anything). Oil and stains clean up with a basic floor cleaner. And if one plank does get damaged badly enough to bother you, a flooring installer can pull up and replace individual click-lock planks without redoing the whole floor.
Hardwood in a kitchen is possible. Beautiful, even. But it requires vigilance. Mats in front of the sink and dishwasher. Immediate cleanup of any spills. Regular inspection of appliance connections for slow leaks. If you’re someone who keeps a tidy kitchen and doesn’t mind the maintenance routine, hardwood can work. If your kitchen is the center of a busy household with kids and pets, LVP removes the worry entirely.
For a 200-square-foot kitchen floor, you’re looking at $600 to $1,600 installed for mid-range LVP versus $1,600 to $3,000 for hardwood. That $1,000-plus savings is real money in a kitchen remodel.
The Bathroom
LVP. Only LVP. This one isn’t a debate.
A bathroom is the wettest room in the house. Shower splash, bath overflow, toilet condensation, wet feet stepping out of the tub, humidity from hot showers that condenses on cool surfaces. Water finds its way to the floor constantly, and unlike a kitchen where spills are occasional, a bathroom floor gets wet by design.
Hardwood cannot handle this environment long-term. I’ve ripped out hardwood bathroom floors that were installed 3 years earlier and already showed warping, black mold stains along the edges, and soft spots near the toilet. That’s money down the drain and a health concern on top of it.
LVP in a bathroom gives you the wood look with complete waterproof protection. The floor can get soaked and it doesn’t care. Water won’t penetrate the surface, won’t wick into the core, and won’t cause mold growth underneath. For bathrooms, this is the entire conversation.
Tile is the other common bathroom flooring choice and it performs great in wet environments too. But LVP is warmer underfoot, softer to stand on, and faster to install. I give clients both options and let them choose based on the look they prefer.
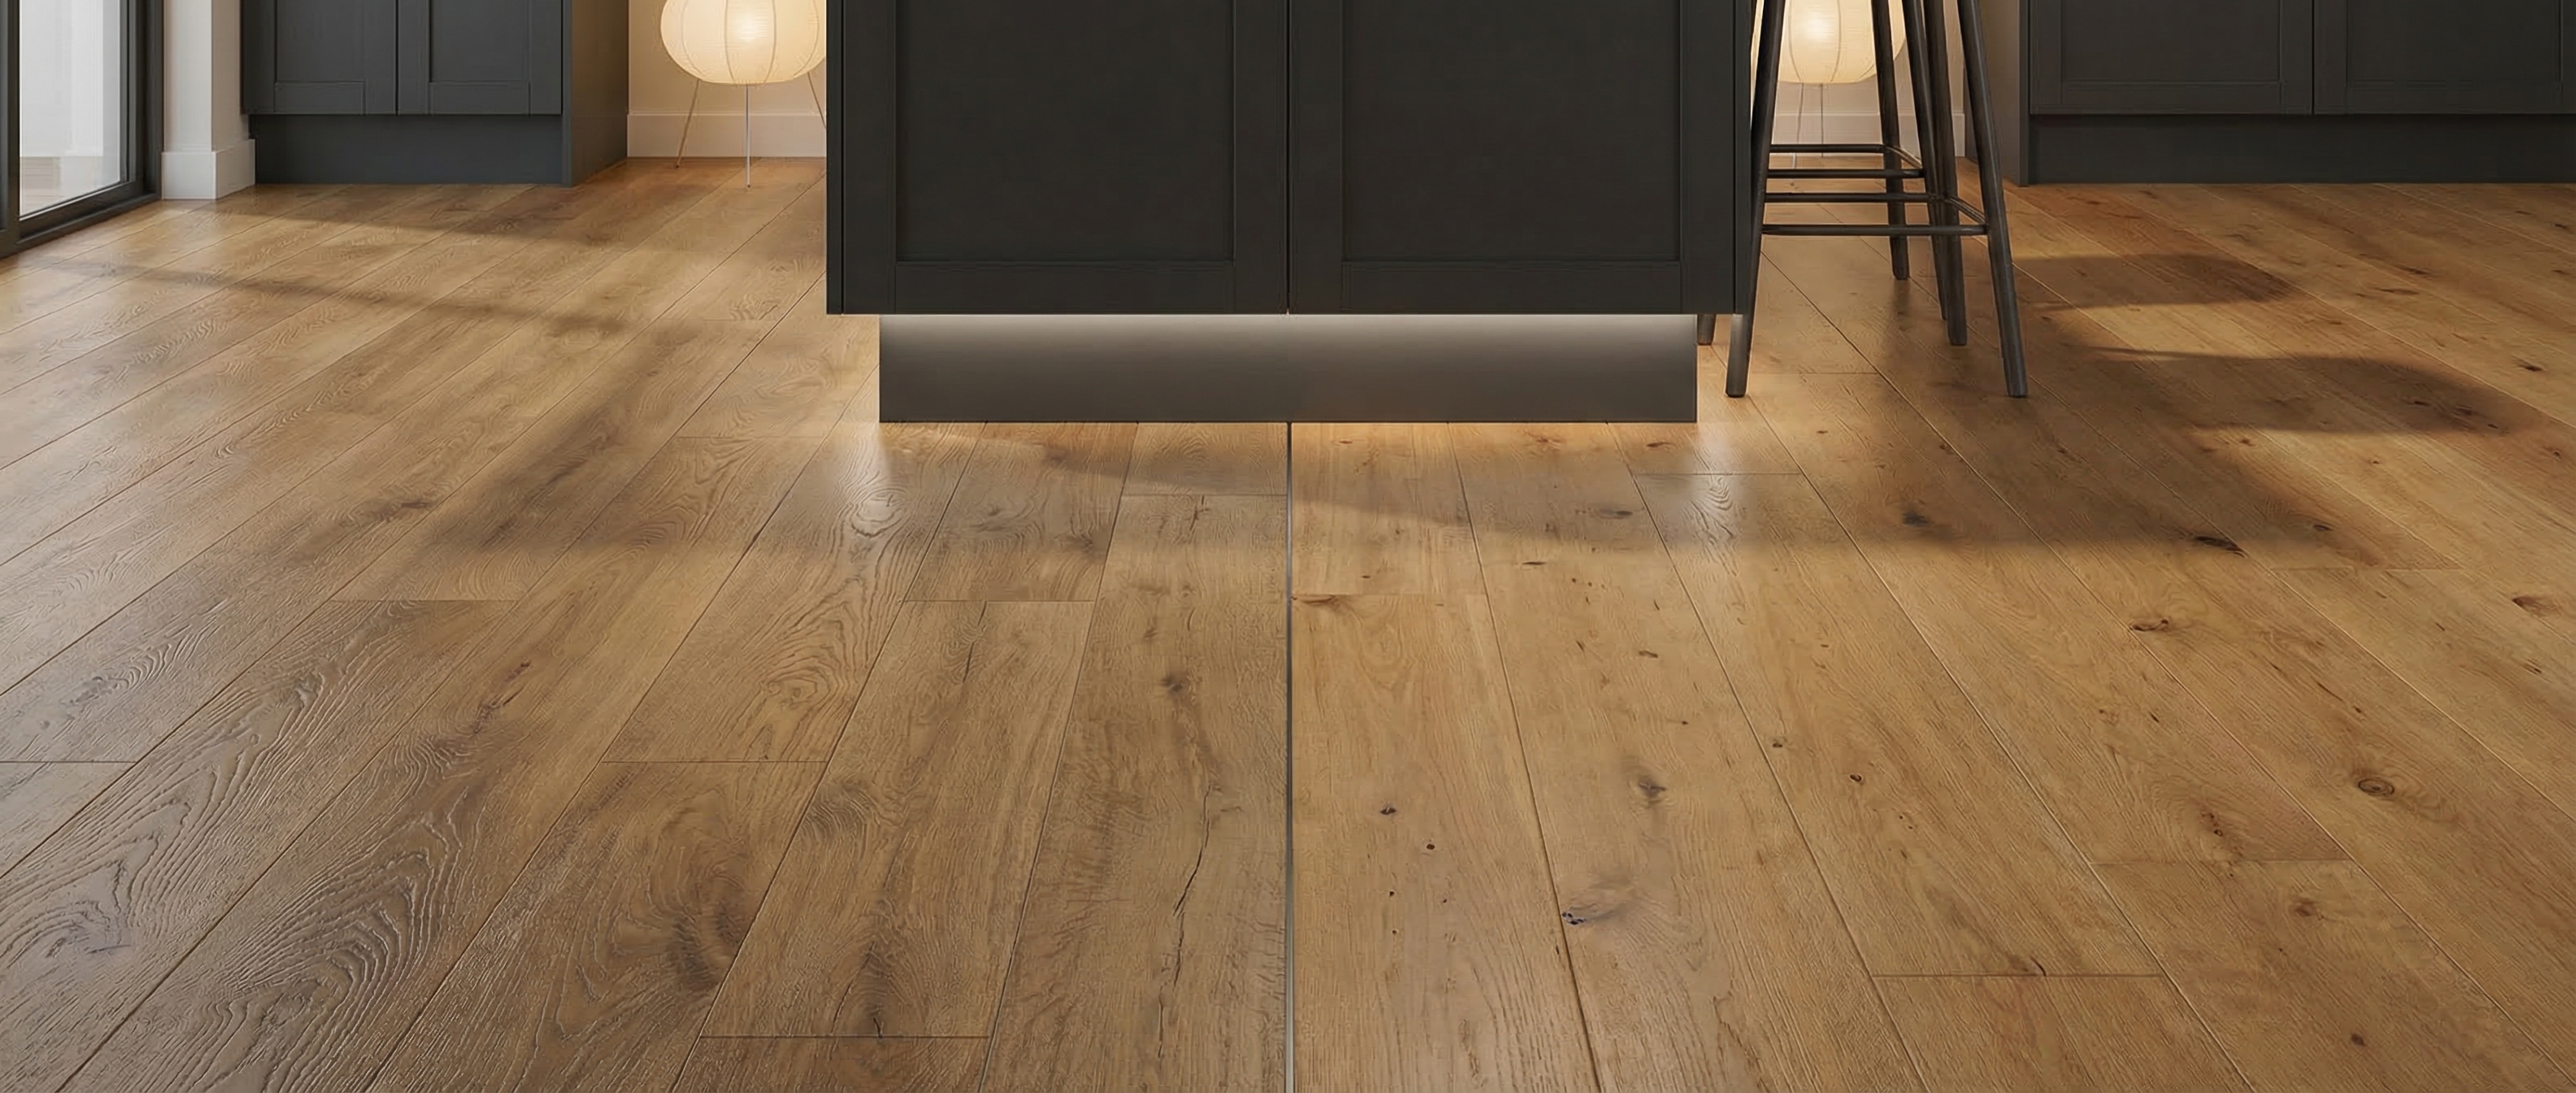
Living Room and Bedrooms
This is where hardwood shines. These rooms stay dry. The primary wear is foot traffic, furniture movement, and the occasional dropped object.
Hardwood brings warmth, character, and depth to living spaces that LVP doesn’t fully replicate. You can feel the difference underfoot. You can see how light plays across real wood grain versus a printed image. And you can hear the solid sound versus the slightly hollow resonance of a floating floor.
If your budget supports hardwood here, go for it. This is where the 50- to 100-year lifespan and refinishing ability pay off. These rooms don’t get wet, so hardwood’s biggest weakness isn’t a factor.
If budget is a constraint, quality LVP in the 7 to 8 mm range with an attached pad still looks and feels great. Nobody will walk into your living room and say “that’s vinyl” unless they get on their hands and knees. The technology has gotten that good.
The Basement
LVP. Always. Basements sit on or below grade, with the concrete slab in direct ground contact. Moisture wicks up through concrete constantly, even with a vapor barrier. Many older PNW homes have basements with damp spots, efflorescence, or outright water intrusion during heavy rain.
Hardwood over a basement slab is a recipe for cupping and buckling within the first year. LVP installed over concrete with a simple foam or cork underlayment gives you a finished floor that looks great and laughs off any moisture from below. For game rooms, home offices, or guest bedrooms below grade, LVP is the only flooring I recommend.
Installation: What to Expect on Install Day
The installation timeline is one of the biggest practical differences between LVP and hardwood, and it directly affects how long your kitchen remodel takes.
LVP Installation
A typical kitchen LVP install takes 1 to 2 days, including subfloor prep and transitions. The prep work (removing old flooring, checking the subfloor, laying underlayment) takes 2 to 3 hours on a clean subfloor. A skilled installer can lay 200 to 300 square feet of LVP in 4 to 6 hours. The planks cut with a utility knife for straight cuts and an oscillating saw for detail work around door frames and plumbing.
The floor is walkable immediately. No drying time. No curing period. You can put your kitchen back together the same day.
Hardwood Installation
A kitchen hardwood install takes 3 to 5 days, sometimes more. Before installation even begins, the wood needs 3 to 5 days to acclimate in your home and reach equilibrium with your indoor humidity.
Prefinished hardwood (factory-sanded and coated) is walkable right after the last plank goes in. Site-finished hardwood (raw planks sanded and finished in place) adds 2 to 3 more days for sanding, staining, and 2 to 3 coats of polyurethane with drying time between each coat. The finish needs 24 to 48 hours before sock-foot traffic and 72 hours before furniture goes on it. You get a flawless, custom look with no visible seams, but the time, dust, and fumes are real tradeoffs.
In a kitchen remodel with a 6- to 10-week timeline for cabinets, countertops, and plumbing, flooring scheduling matters. I can often slot the LVP install into a single day near the end of the project, right before the appliances go back in.
The Cost Conversation: What You’ll Actually Spend
Let me lay out real numbers based on what I charge and what I see from material suppliers here in Pierce County. National averages don’t help you. PNW labor rates and local availability are what determine your actual cost.
LVP Total Installed Cost
| Product Tier | Material per sq ft | Labor per sq ft | Total per sq ft |
|---|---|---|---|
| Budget (4mm, basic wear layer) | $1.50 - $2.50 | $1.50 - $2.00 | $3.00 - $4.50 |
| Mid-range (5-6mm SPC, 12mil+ wear) | $2.50 - $4.50 | $1.50 - $2.50 | $4.00 - $7.00 |
| Premium (7-8mm, attached pad, 20mil+ wear) | $4.00 - $6.00 | $2.00 - $3.00 | $6.00 - $8.00+ |
For a 200-square-foot kitchen at mid-range: $800 to $1,400 all in. That includes removal of old flooring, subfloor prep, underlayment, material, installation, and transitions.
Hardwood Total Installed Cost
| Product Tier | Material per sq ft | Labor per sq ft | Total per sq ft |
|---|---|---|---|
| Engineered, builder grade | $4.00 - $6.00 | $2.00 - $3.00 | $6.00 - $9.00 |
| Engineered, premium (thicker veneer) | $6.00 - $10.00 | $2.50 - $3.50 | $8.50 - $13.50 |
| Solid hardwood, site-finished | $5.00 - $9.00 | $3.00 - $5.00 | $8.00 - $14.00 |
| Solid hardwood, exotic species | $8.00 - $14.00 | $3.50 - $5.00 | $11.50 - $19.00 |
For a 200-square-foot kitchen with mid-range engineered hardwood: $1,700 to $2,700 all in. Same scope as above.
The cost gap is real. On a 200-square-foot kitchen, you save $700 to $1,300 with LVP. On a full main floor at 800 to 1,000 square feet, that gap becomes $3,000 to $6,000. That could cover upgraded countertops, new lighting, or a chunk of the bathroom remodel you’ve been planning.
The Long-Term Math
Here’s where it gets interesting if you think past the initial install.
LVP over 30 years: Install at $5 per square foot. Replace once around year 20 for another $5 per square foot. Total: roughly $10 per square foot over three decades.
Hardwood over 30 years: Install at $10 per square foot. Refinish at year 10 for $4 per square foot. Refinish again at year 20 for $4 per square foot. Total: roughly $18 per square foot, but the floor is still going strong with another 20 to 30 years ahead of it.
On a per-year basis, hardwood isn’t as expensive as it looks up front. But most homeowners make decisions based on what the budget allows today, not what the cost per year works out to over three decades. Both approaches are valid.
Cost Reality: On a 200-square-foot kitchen, LVP saves you $700 to $1,300 over hardwood. On a full main floor (800+ sq ft), the gap becomes $3,000 to $6,000. That’s real money you can redirect toward countertops or appliances.
The Resale Value Question
I get asked about this on almost every flooring job. Real hardwood floors add measurable value to a home sale. National Association of Realtors data consistently shows that homes with hardwood sell faster and for slightly higher prices than comparable homes without. In the PNW market, hardwood in the main living areas signals quality and permanence to buyers.
LVP is more neutral. Buyers don’t penalize it in kitchens and bathrooms where it makes obvious practical sense. But they don’t assign the same premium they give to real hardwood in living spaces. The gap is narrowing as LVP quality improves, but it’s still there.
My recommendation for resale: if you plan to sell within 5 years, put hardwood in the living room and bedrooms and LVP in the kitchen and bathrooms. Best of both worlds. If you’re staying long-term and want simplicity, LVP throughout the main floor is a perfectly reasonable choice that no buyer will hold against you.
Common Questions I Get on the Job
Is LVP really cheaper than hardwood?
Yes. On every metric. Material cost is lower ($2 to $6 per square foot versus $4 to $14 for hardwood material). Labor is lower because LVP installs faster and requires less subfloor prep. And LVP doesn’t need acclimation time, which means less scheduling delay. For a typical kitchen, you’ll save 40% to 60% by choosing LVP over hardwood.
Does LVP look cheap?
Not if you buy quality product. Budget LVP in the $2 per square foot range can look plasticky, with repeating patterns and an unnatural sheen. But mid-range and premium LVP ($4 to $8 per square foot installed) uses embossed-in-register textures where the surface texture matches the printed grain pattern. The result looks and feels remarkably like real wood. I’ve had homeowners’ guests ask what species of hardwood is in the kitchen, only to be told it’s vinyl. At the higher end of the market, you have to look very closely to tell the difference.
Can you put hardwood in a kitchen?
You can. I’ve done it. But I make sure every client understands the risk. Hardwood in a kitchen means committing to a maintenance routine: mats in front of the sink and dishwasher, immediate spill cleanup, regular inspection of water supply lines and appliance connections. One undetected leak can damage hundreds of dollars’ worth of flooring. If you’re diligent and willing to accept that risk, hardwood kitchens look stunning. If the idea of policing every spill stresses you out, go with LVP and relax.
How long does LVP last?
Most quality LVP carries a 15- to 25-year residential warranty. Real-world lifespan depends on the wear layer thickness, foot traffic, and whether you have pets (dog nails are the number one wear factor I see). In a kitchen with normal family use, I’d expect a mid-range LVP to look good for 15 to 20 years before it starts showing enough wear to want a replacement. Premium LVP with a 20-mil-plus wear layer can push 25 years in a residential setting.
Does LVP hurt resale value?
No. LVP in kitchens and bathrooms is expected at this point. Buyers understand why it’s there. Where LVP might slightly underperform is in main living areas where buyers expect hardwood in higher-end homes. But for kitchens, bathrooms, and basements, LVP is a neutral-to-positive feature that no reasonable buyer would object to.
Can you install LVP over existing tile?
In most cases, yes. The tile needs to be well-adhered, level, and the grout lines no deeper than about 3/16 of an inch. The floating click-lock system doesn’t need to bond to the surface below. Deep grout lines or uneven tile can be fixed with self-leveling compound before installation. This saves the cost and mess of tile demolition, which runs $3 to $5 per square foot in labor and disposal. I’ve done LVP-over-tile in several bathroom remodels and the results are great.
What’s the best LVP thickness for a kitchen?
At least 5.5 mm SPC with a 12-mil wear layer minimum. If the budget allows, 6 to 7 mm with a 20-mil wear layer and attached cork or IXPE underlayment is the sweet spot. You’ll feel the difference underfoot, and the thicker wear layer means the floor still looks good at 15 to 20 years instead of showing wear patterns in front of the sink and stove after 8 to 10.
The Straightforward Answer
If you’ve read this far, you probably already know which direction makes sense for your home.
For kitchens, bathrooms, basements, and mudrooms, LVP is the practical winner. It handles water, costs less, installs faster, and requires almost zero maintenance. For living rooms, dining rooms, and bedrooms where water isn’t a factor and you want the warmth of real wood, hardwood is still the best flooring you can put in a home. If your budget or lifestyle calls for one material throughout, a premium LVP in the 7 to 8 mm range with an attached pad gives you a beautiful, worry-free floor from the front door to the back bedroom.
I install both materials every week across Pierce County. I don’t push one over the other because I don’t have a financial incentive to sell you a specific product. My job is to give you the straight information, help you pick the right flooring for each room, and install it right.
If you’re planning a kitchen remodel, bathroom remodel, or flooring replacement anywhere in your home, I’d be glad to walk your space and give you a detailed estimate with real numbers.
Call me at (253) 392-9266 or reach out through the website. Free estimates, no pressure. Just a contractor who’s installed enough of both to tell you what actually works.